

JakefaceCustoms
FormD T1 v2.0 - v2.5 and Ncase T1 v2.5 Custom Vented Side Panel
FormD T1 v2.0 - v2.5 and Ncase T1 v2.5 Custom Vented Side Panel
Couldn't load pickup availability
Replace your FormD T1 v2.0 - v2.1 and Ncase T1 v2.5 side panel with these custom cut vented replacements! These vented panels offer more airflow and you'll be able to see the components!
This panel is made from acrylic, which provides extra rigidity and strength. All panels are made to order and custom designs are available by request.
SIDE PANEL FEATURES:
- Direct replacement
- No modding required
- Uses stock mounting method
- More ventilation for even better temps
- Installs exactly like the stock panel!
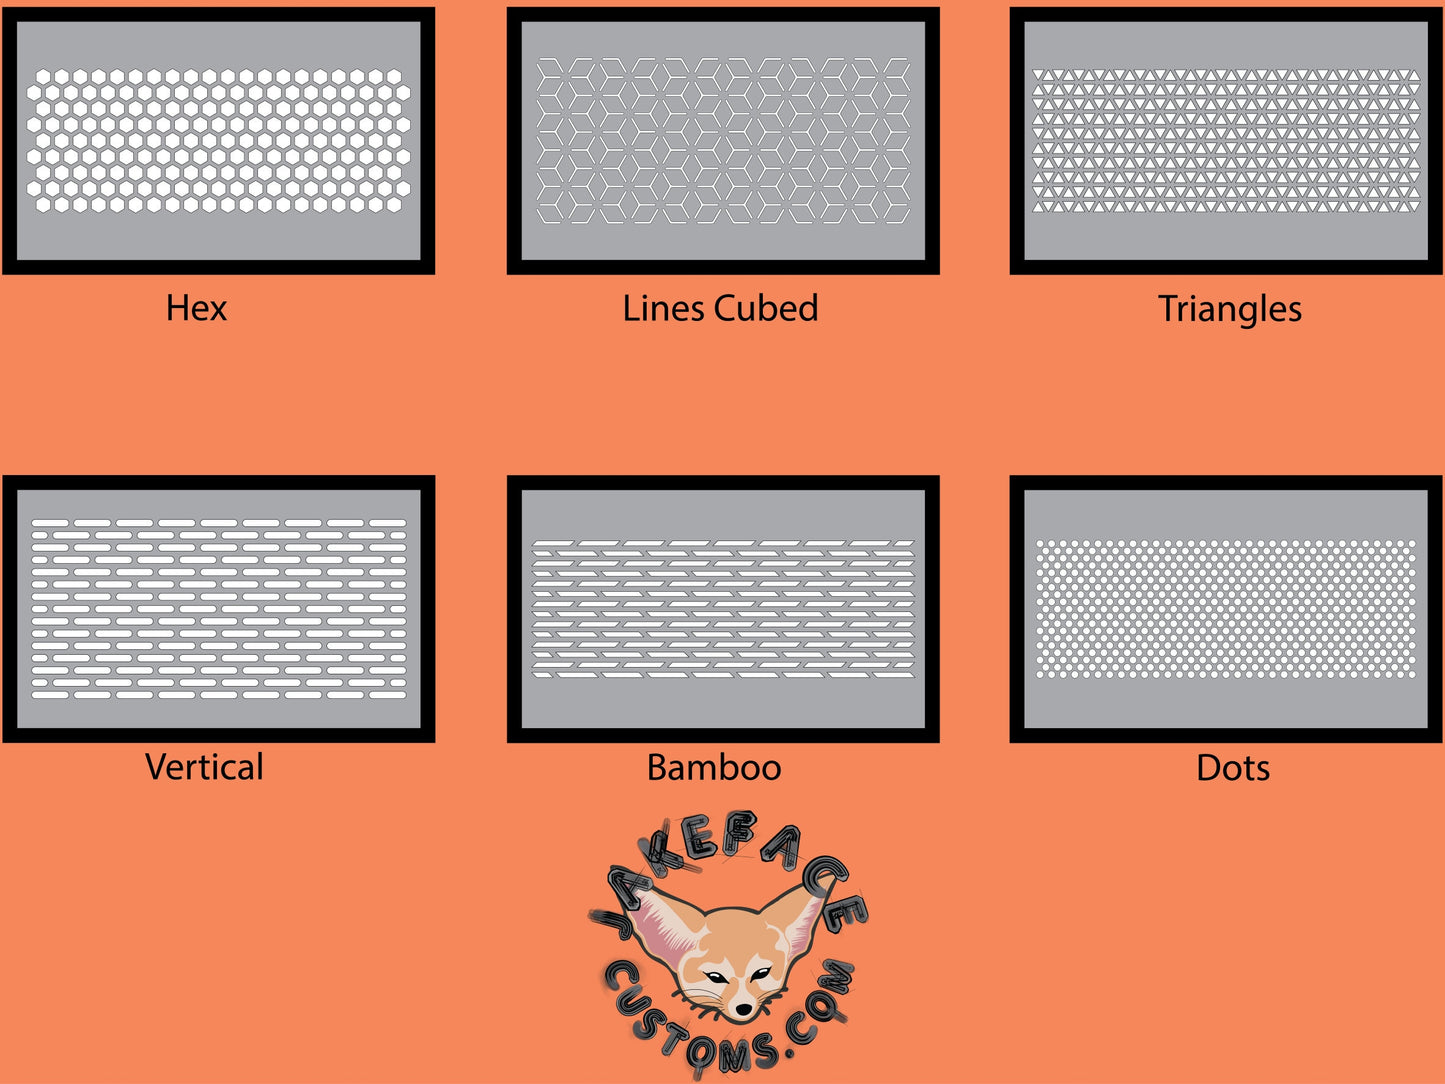
- Multiple designs available
Shipping:
- All panels are shipped in oversized boxes.
- Panels come with protective paper attached
- Lead time is all based on my current workload.
*As with all handmade items, small imperfections may be present
*This listing is for a panel only, case is not included
*Price is for one side panel only.
Materials: acrylic,petg

Collapsible content
Installation
H510 Side Panel
If your new panel isn't fitting easily or you have a newer
model, check the front left corner of the case near the
bottom. There may be a metal tab blocking installation.
Simply bend down that tab in order to have an even fit.
H510 Front Panel
Remove both side panels. On the upper part of the case,
there is a little screw on either side that must be removed
for the original panel to pop off.
If the replacement panel is not fitting easily, especially if
you have a newer model: check the front of the case near
the left side for a small plastic wedge piece. This wedge
serves no purpose and must be removed for the front
panel to fit as intended.
H1 Front Panel
Before installation, remove the six rubber pads on the
front of the case (beneath the factory panel.)
Optional Fan Filters
If you purchased fan filters, these can be installed on the
front or back of your fans using the existing screws
already holding your fan in place.
A4H2O, Meshilicious, Q58, Ncase M1 and any other panel
with pins/pegs:
CAREFULLY and GENTLY install and remove!
Install: line up the pins and they should easily pop into
place (Don't smash!)
Remove: Remove carefully, one pin at a time while
keeping the panel close to the case. Do NOT yank or rip
the panel off from an angle or one side!
TIPS
- Installs like the stock panel!
- No modding required!
SHIPPING
- All international orders include Insurance
- International customers: Tax, duties/VAT may be collected at time of delivery.