JakefaceCustoms
The Original NZXT H510 Elite and Flow Custom Vented Front Panel
The Original NZXT H510 Elite and Flow Custom Vented Front Panel
Couldn't load pickup availability
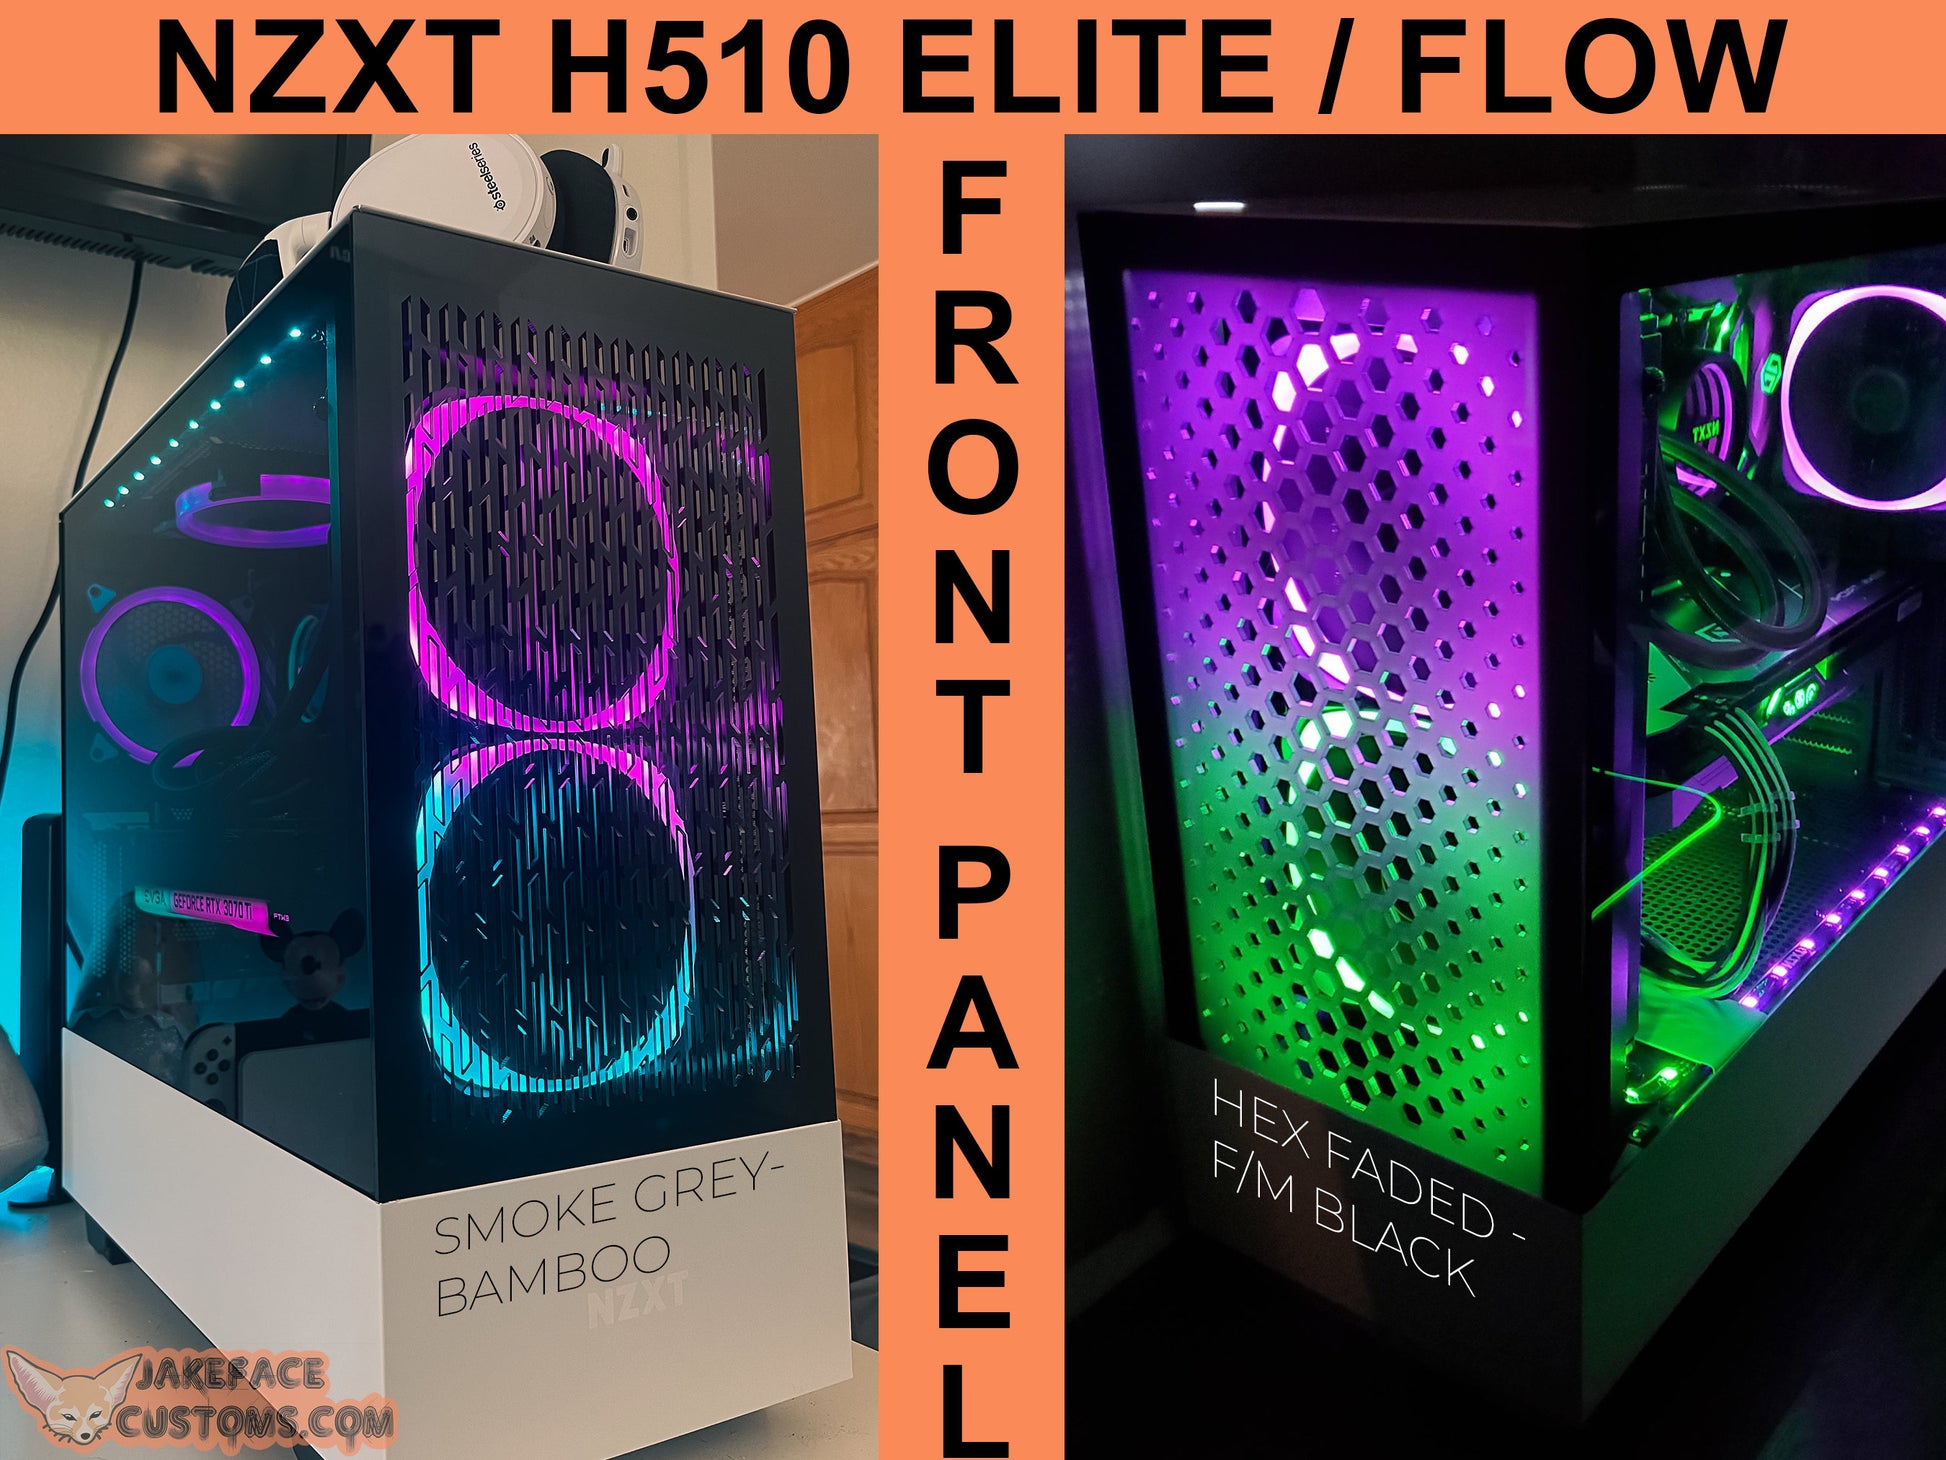
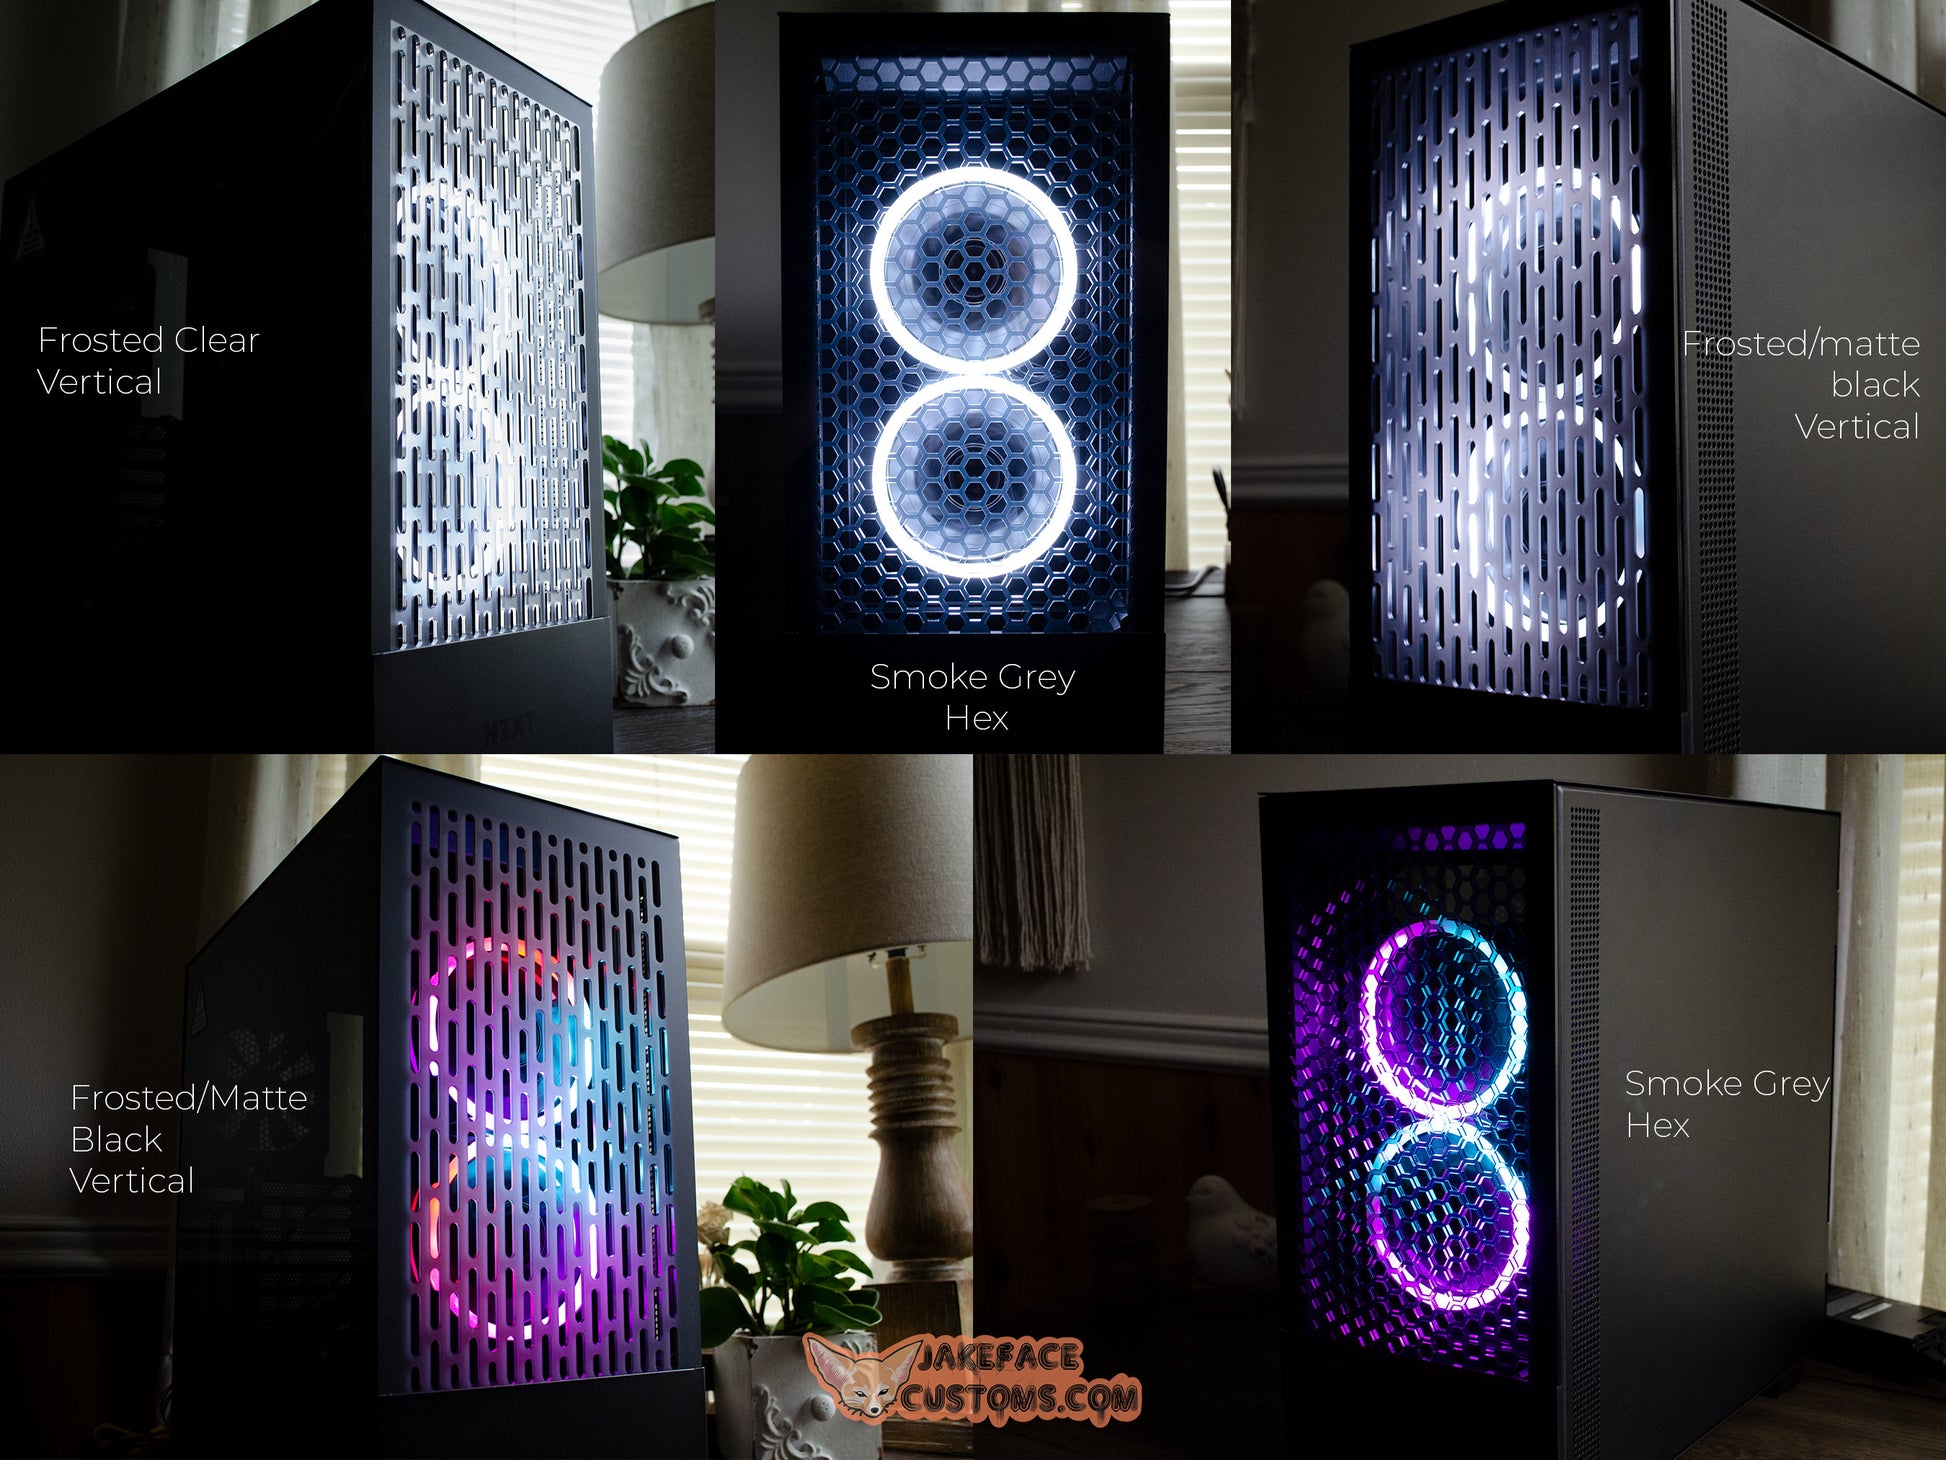
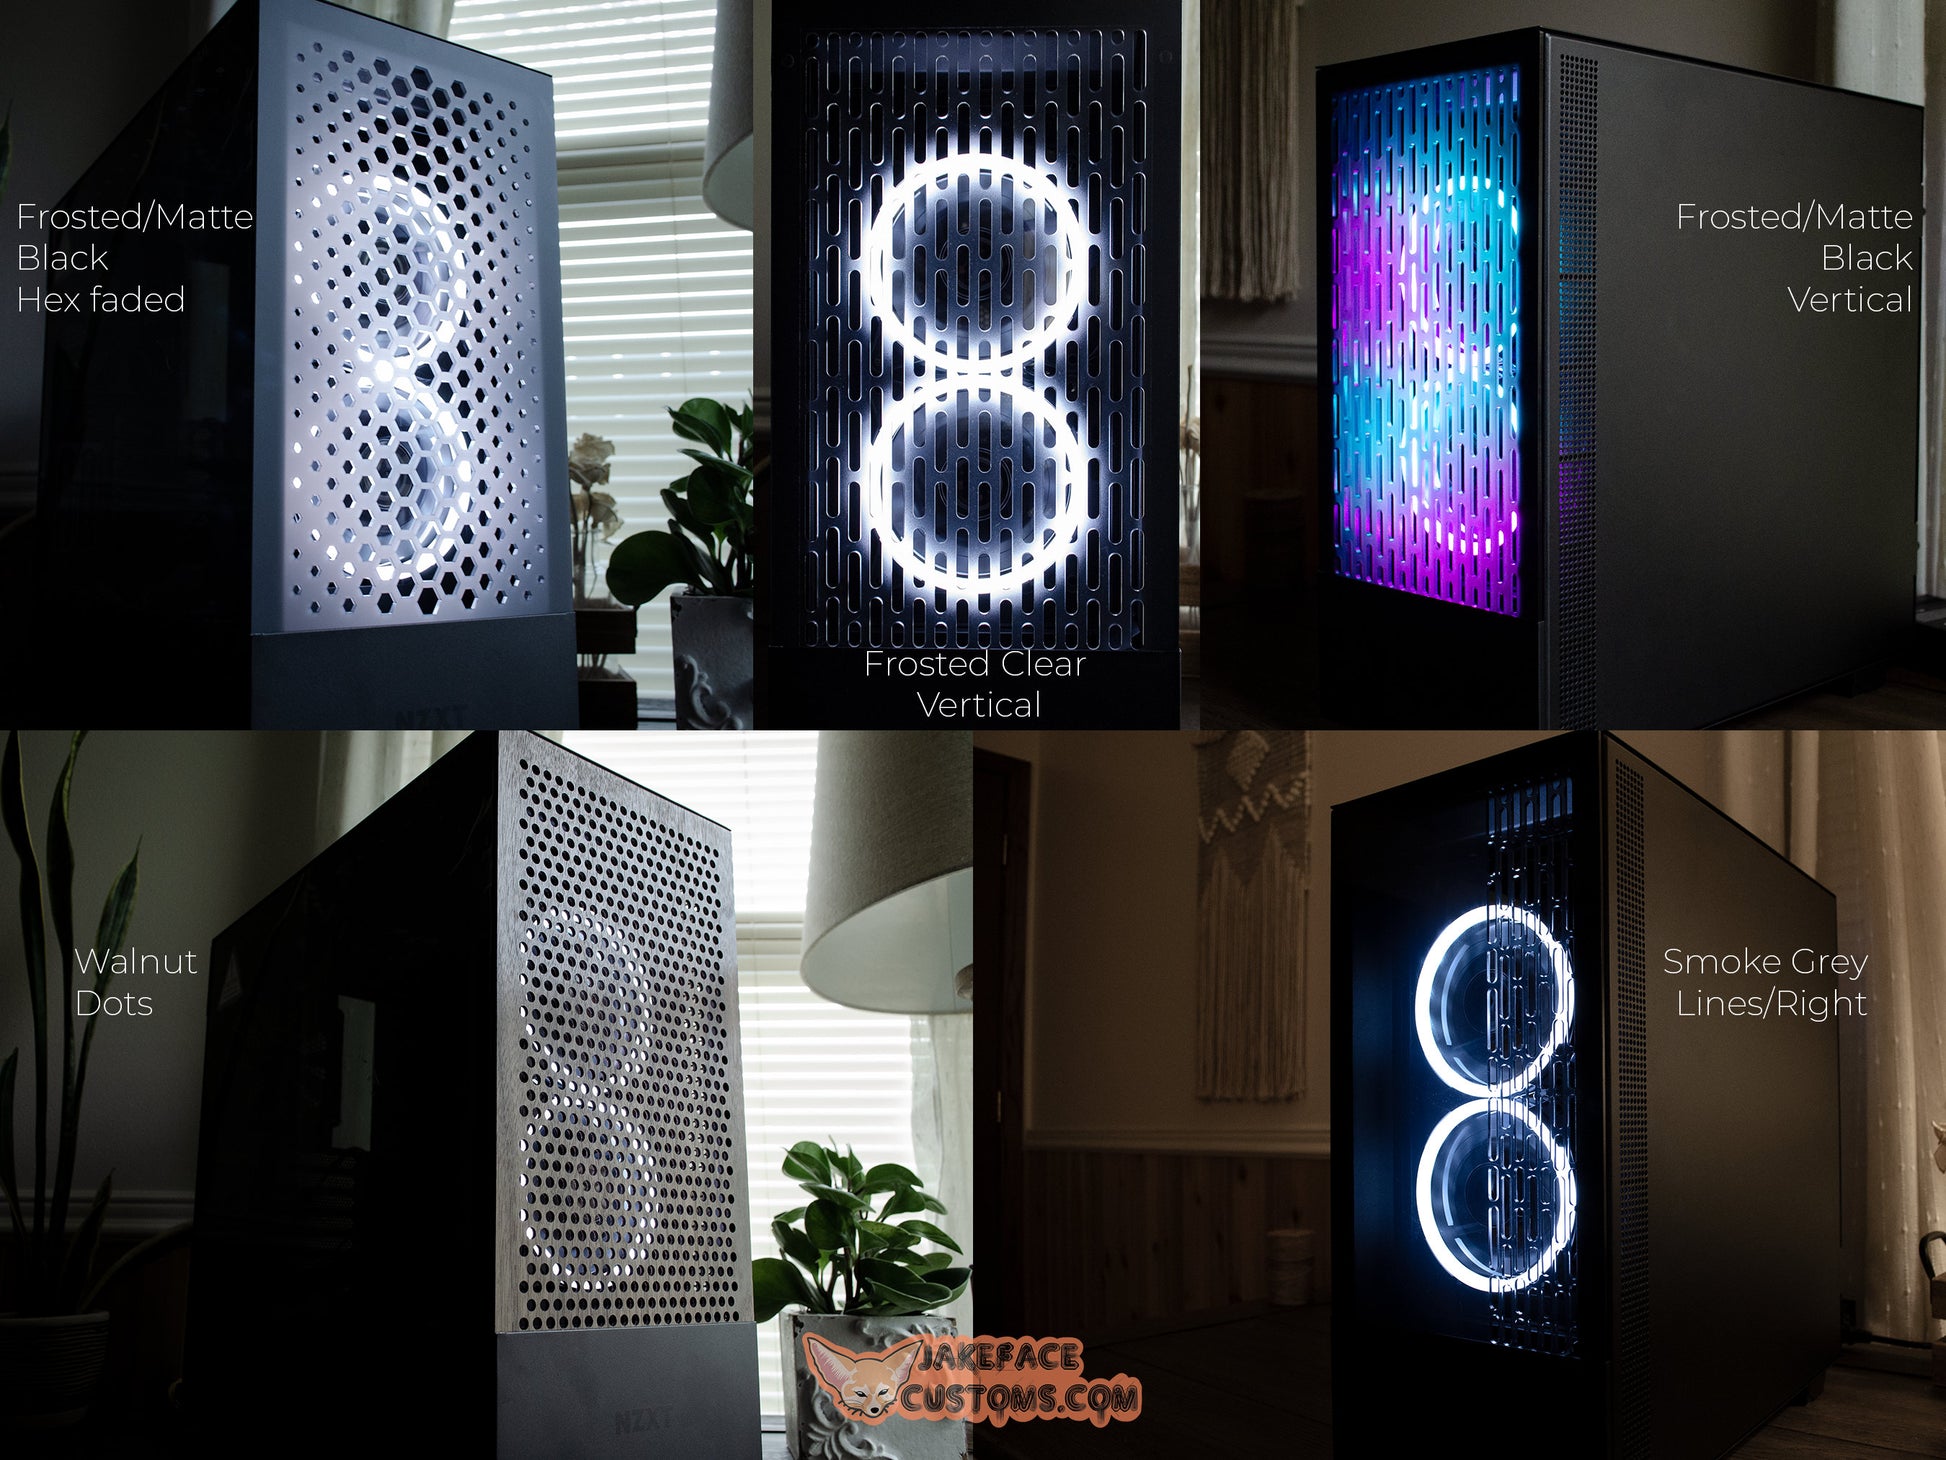
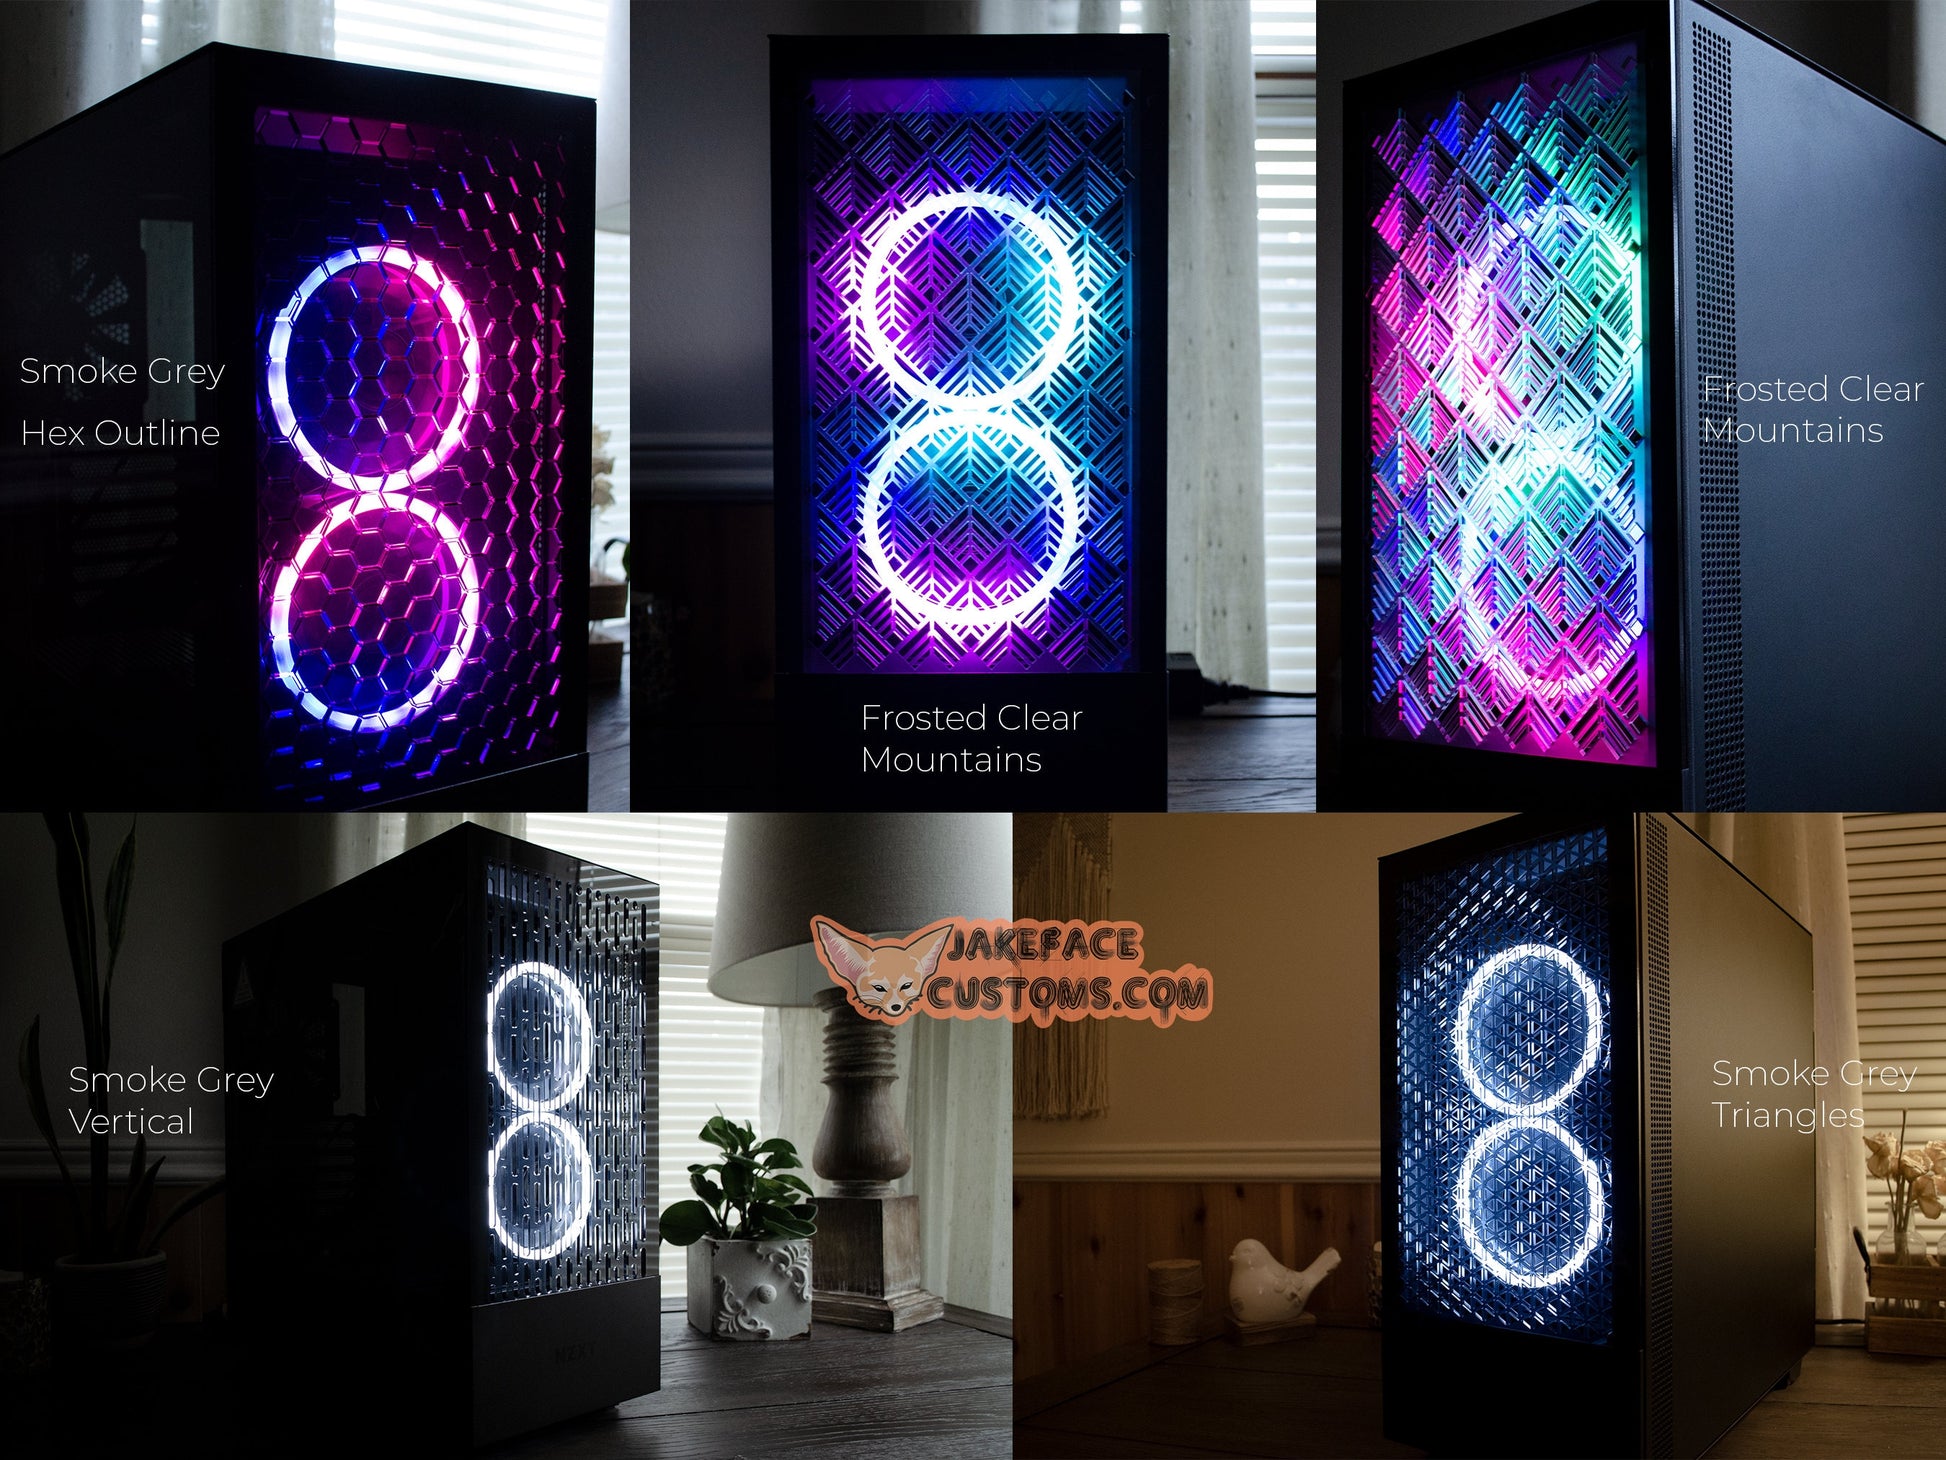
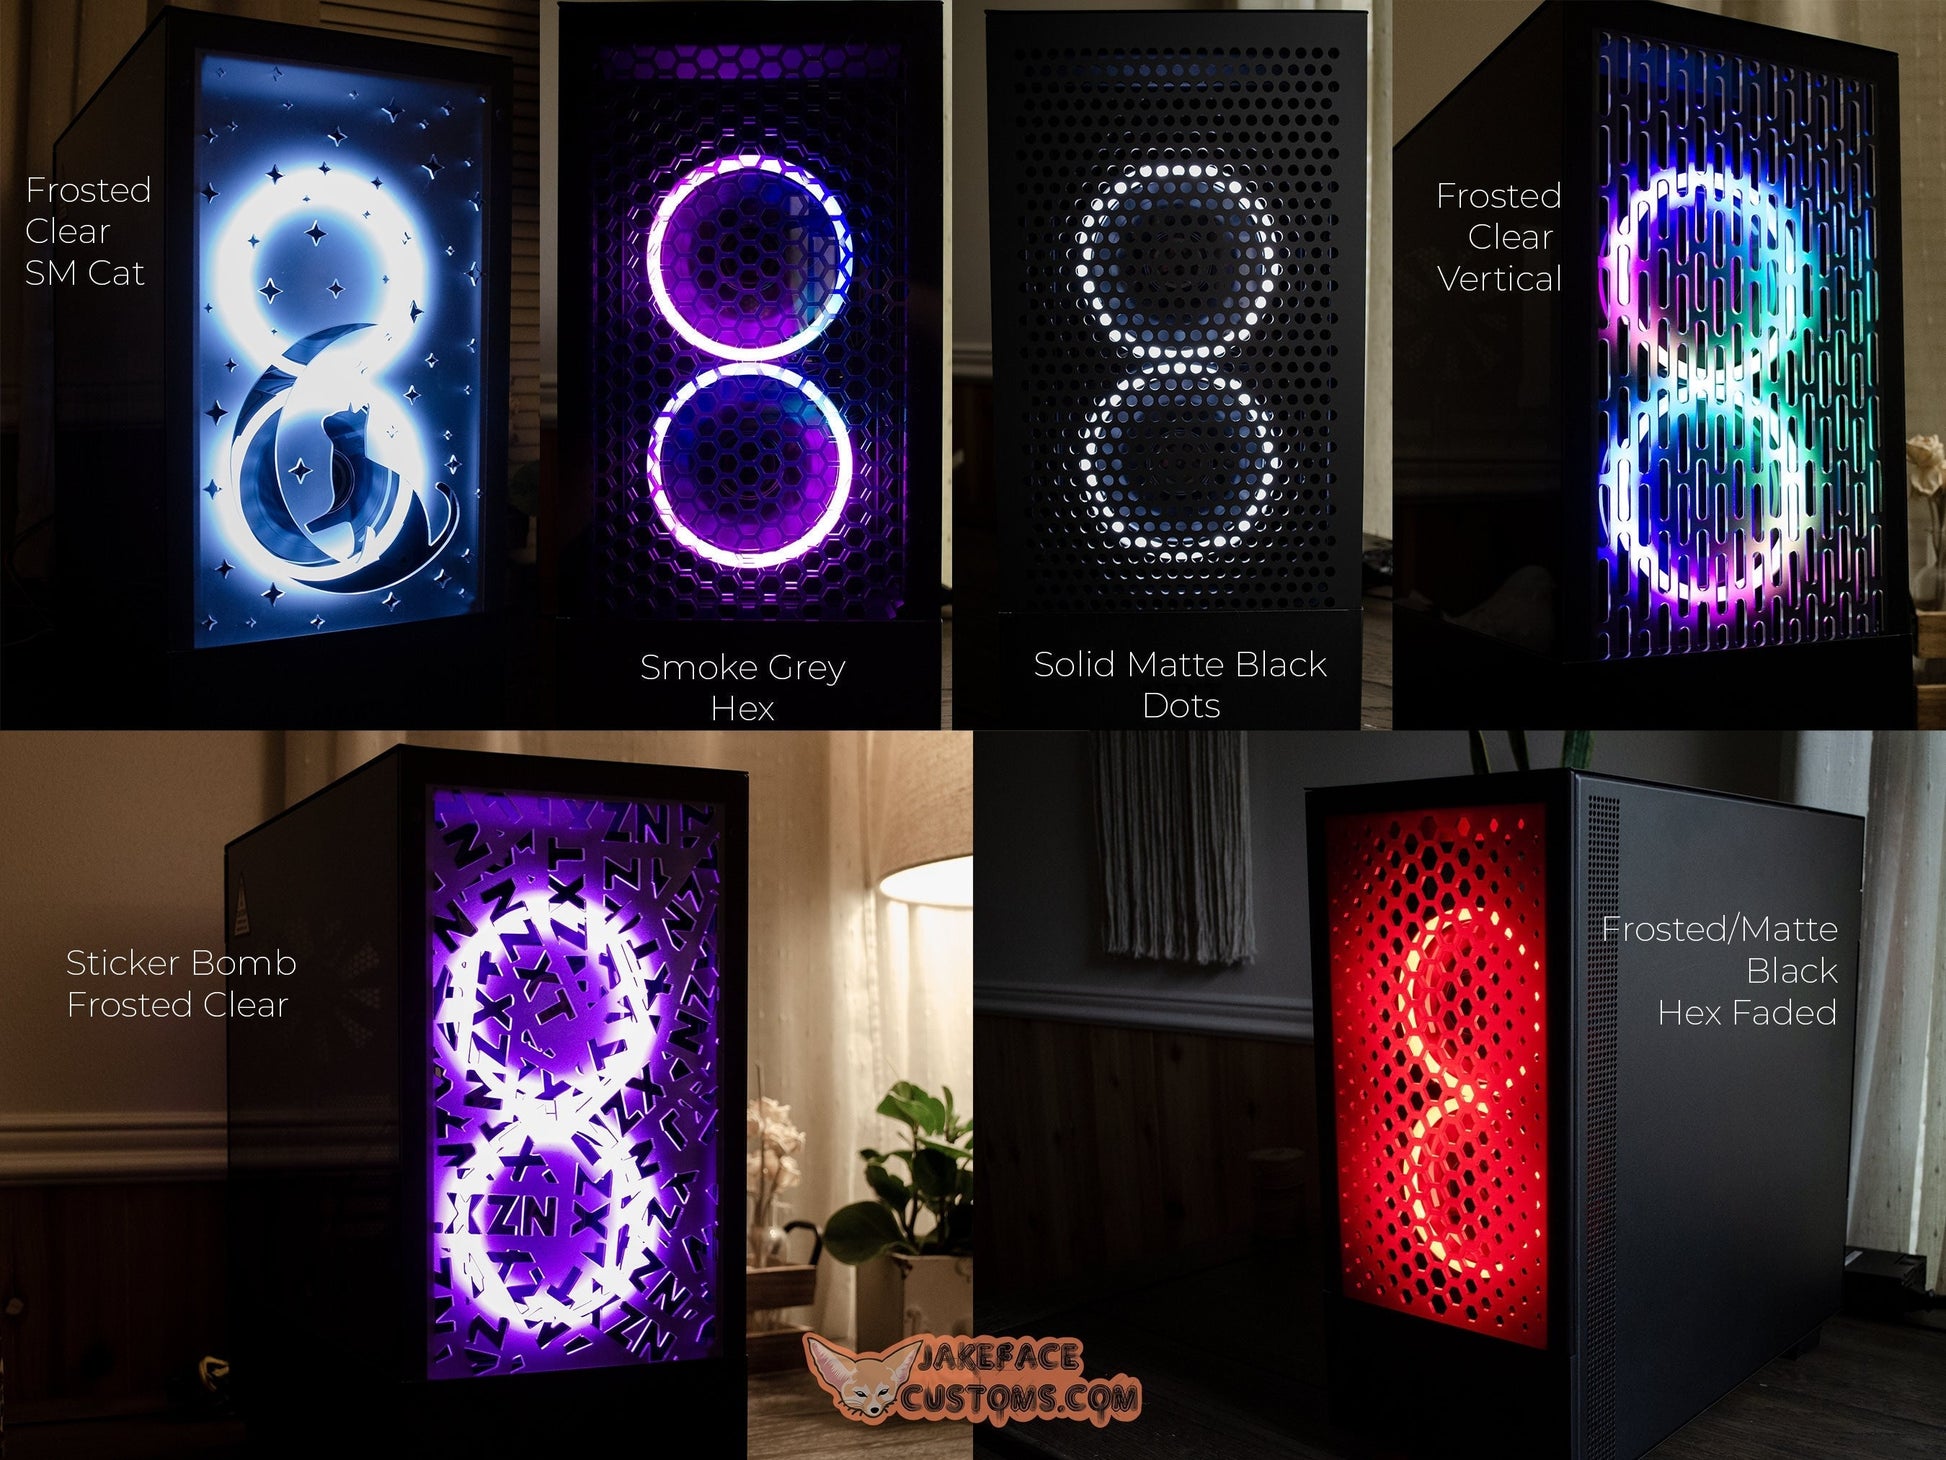
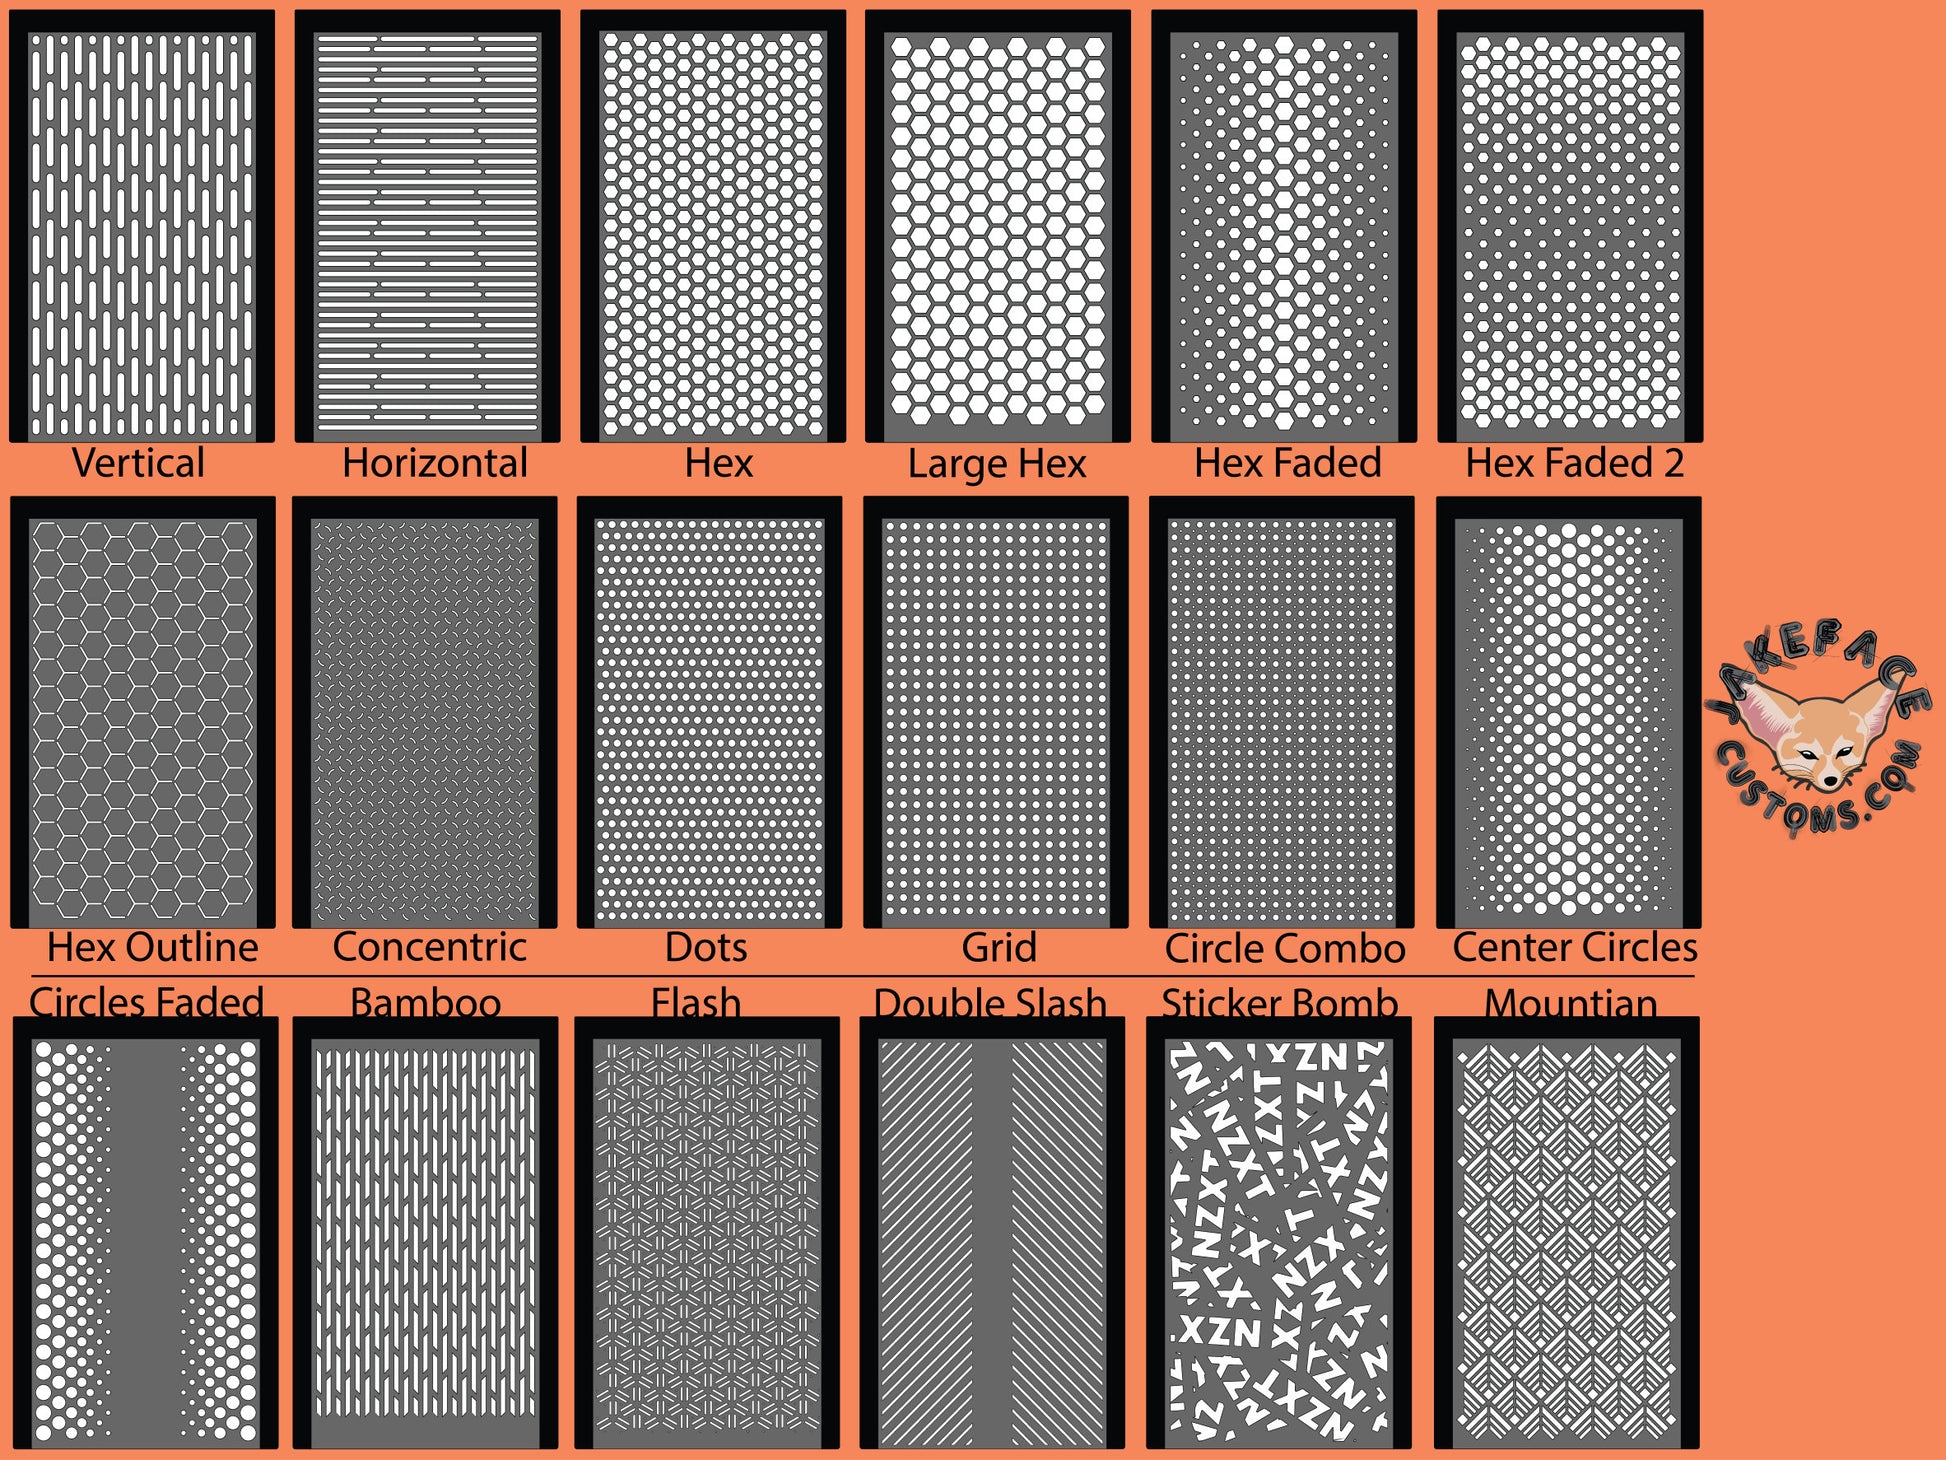
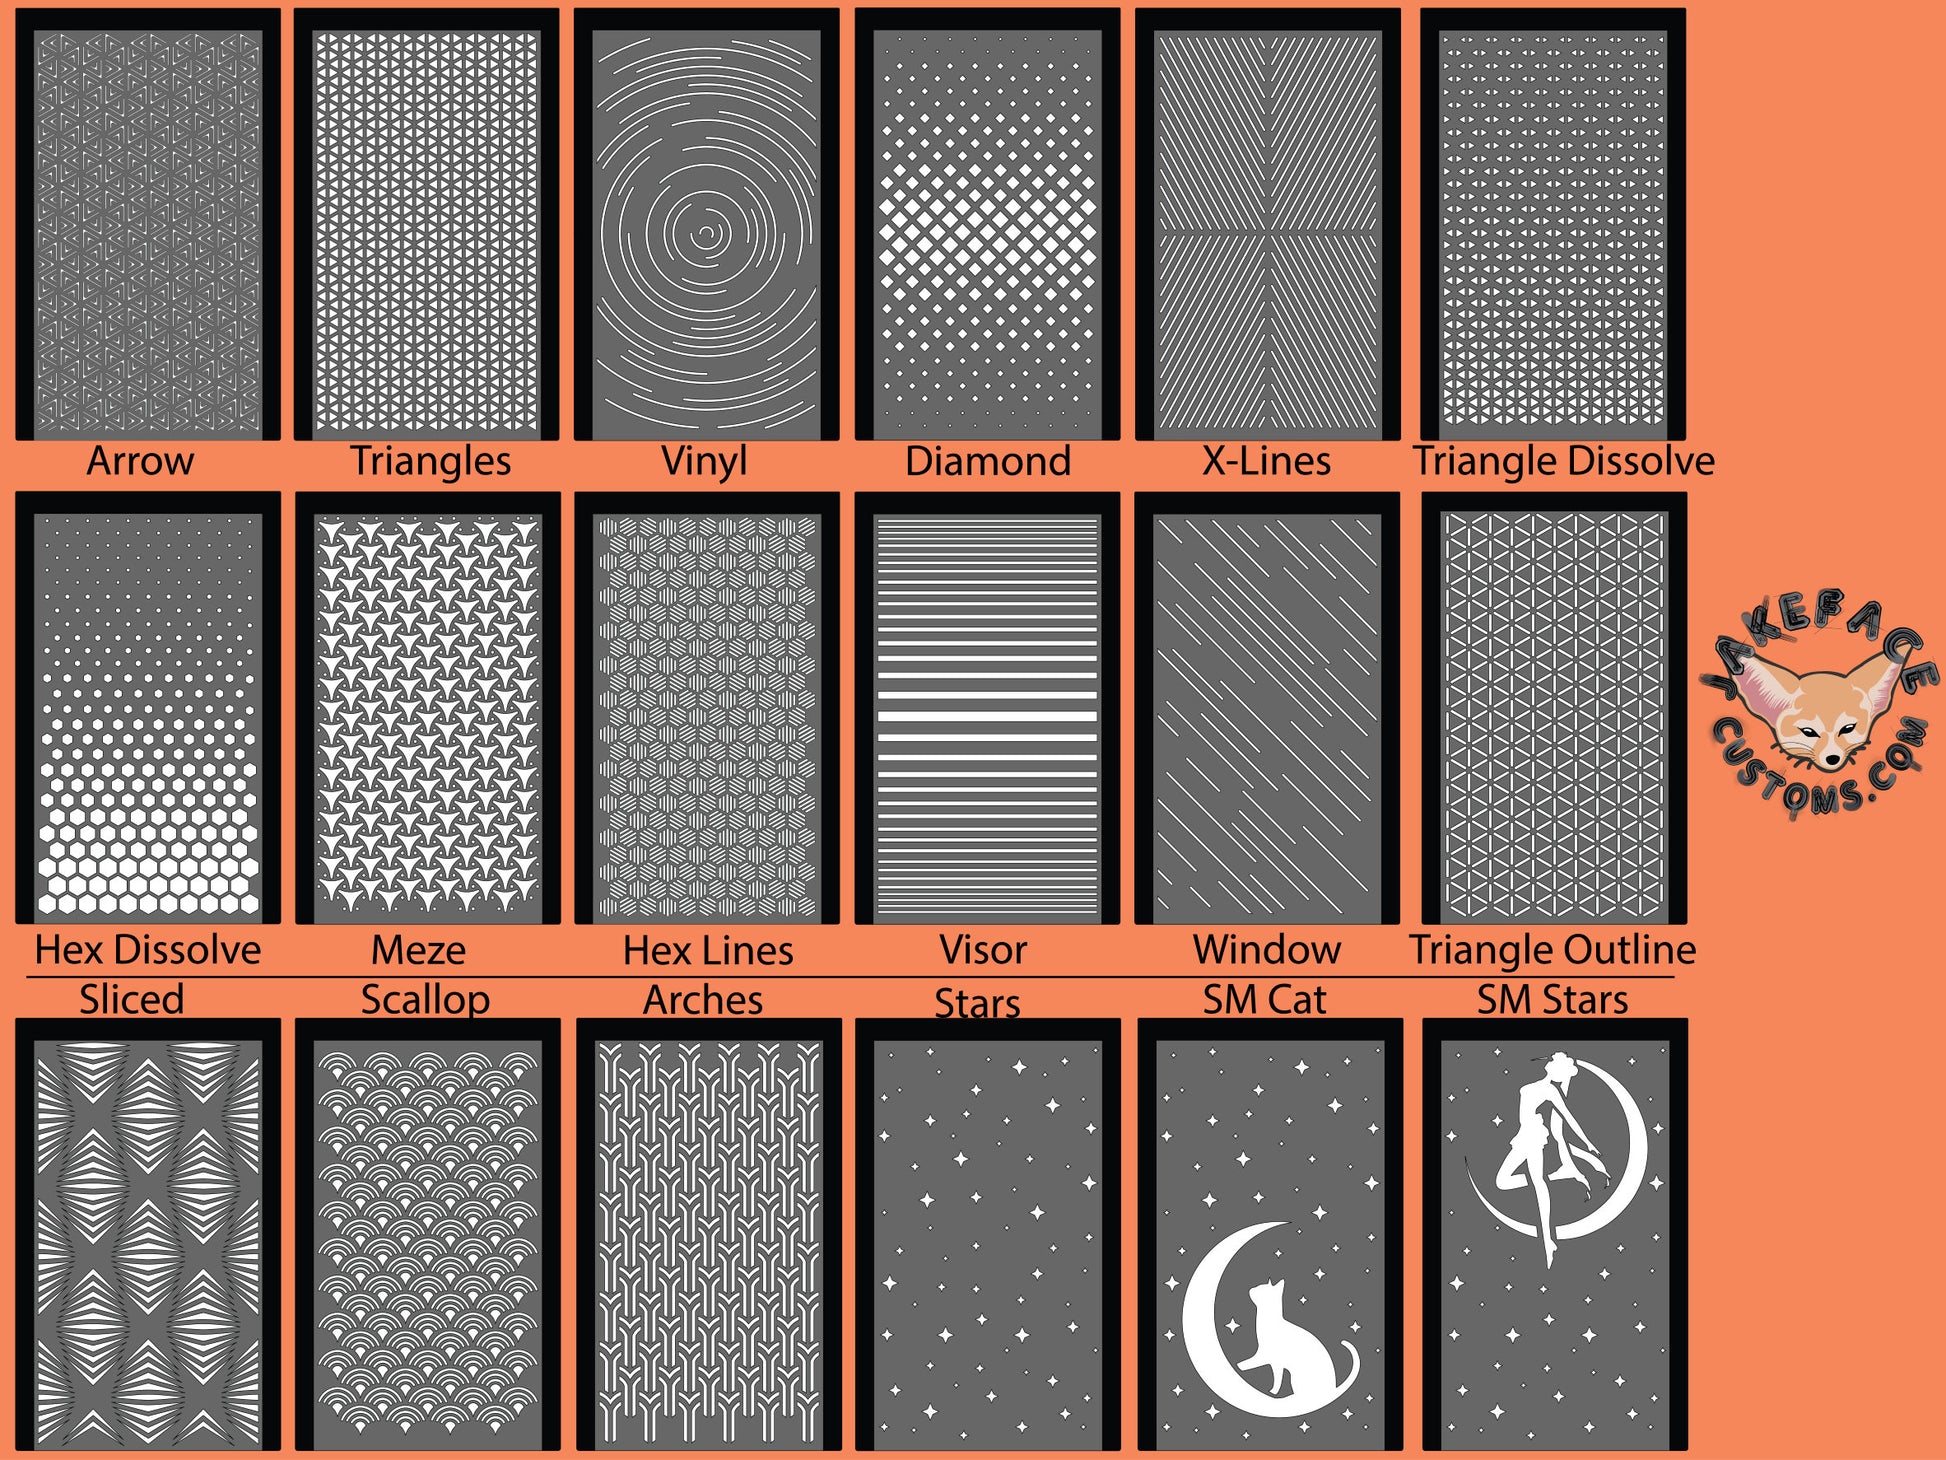
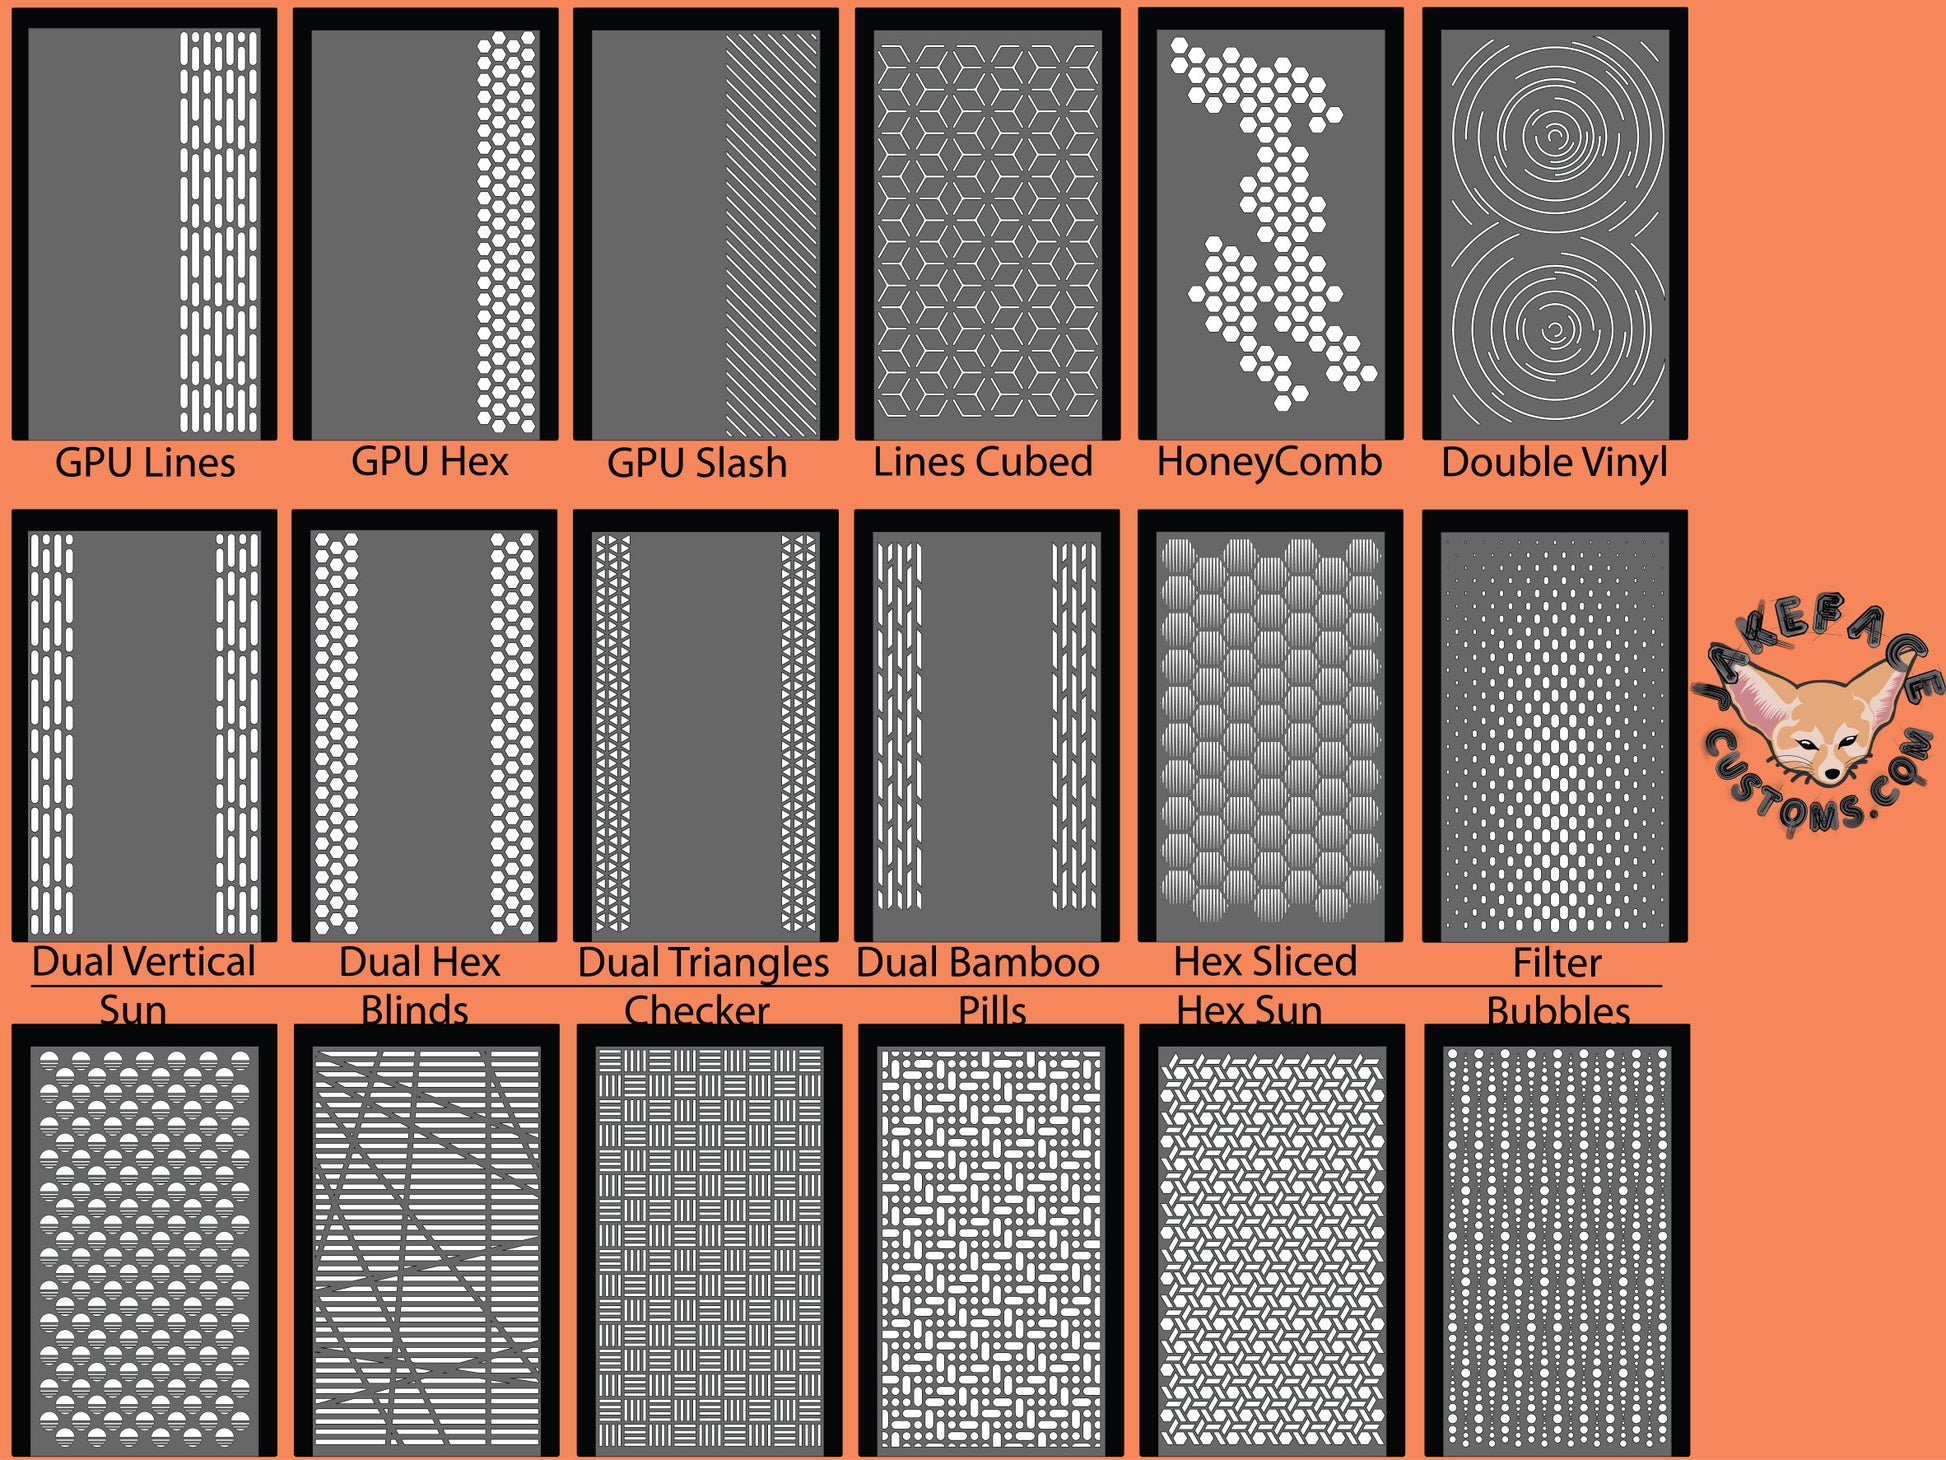
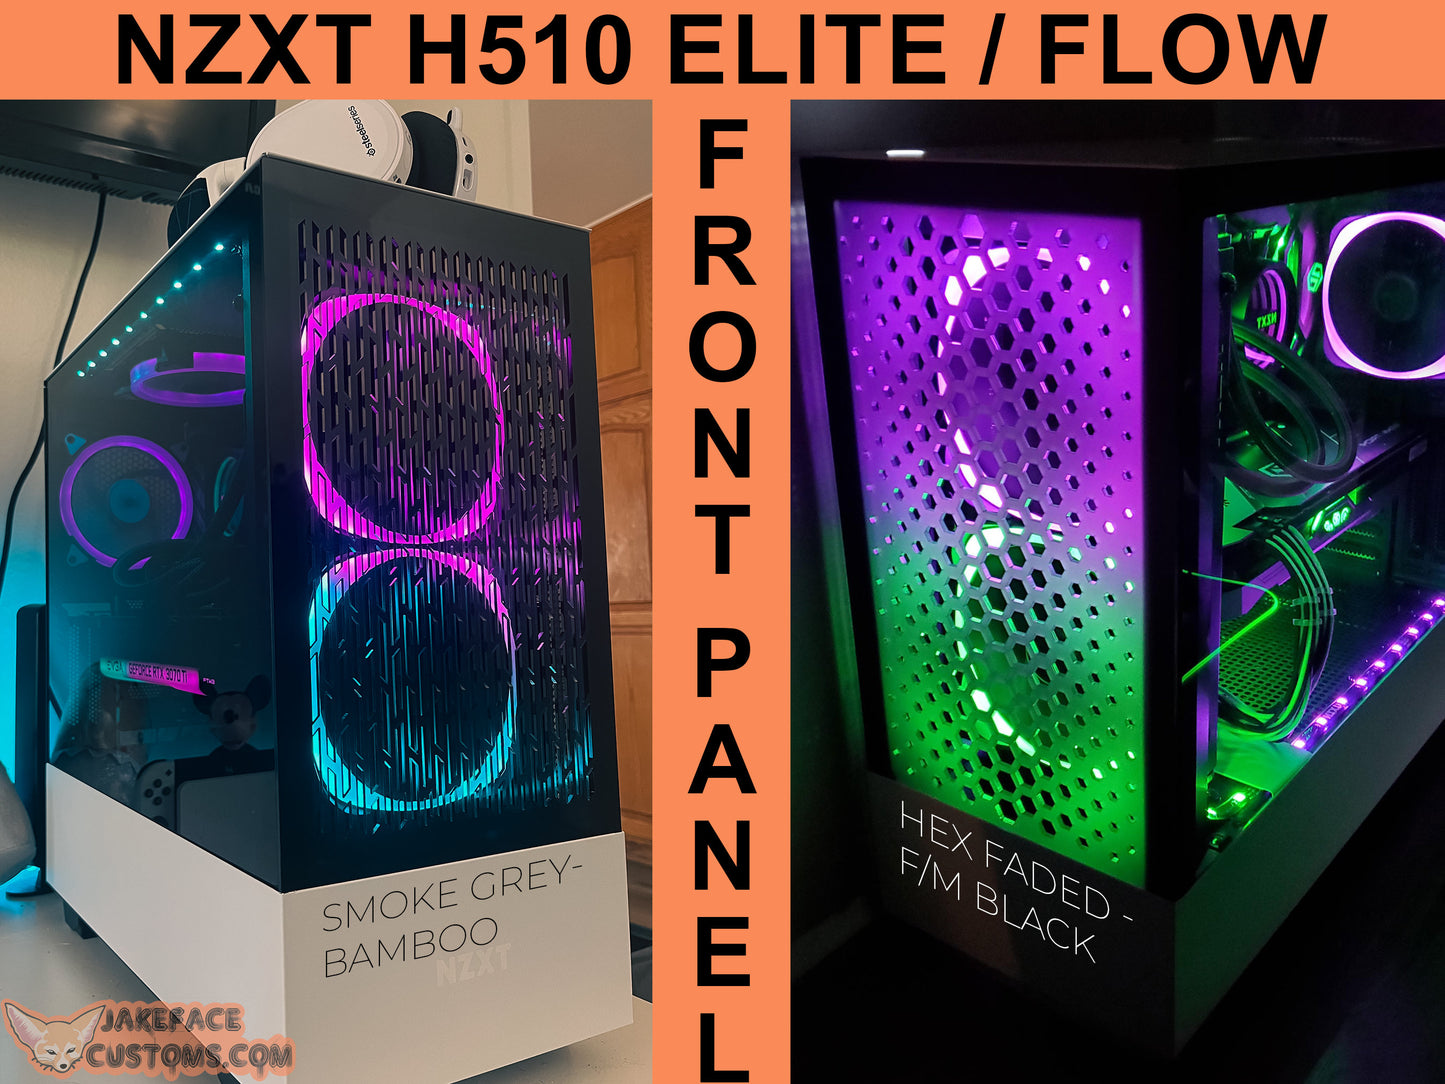
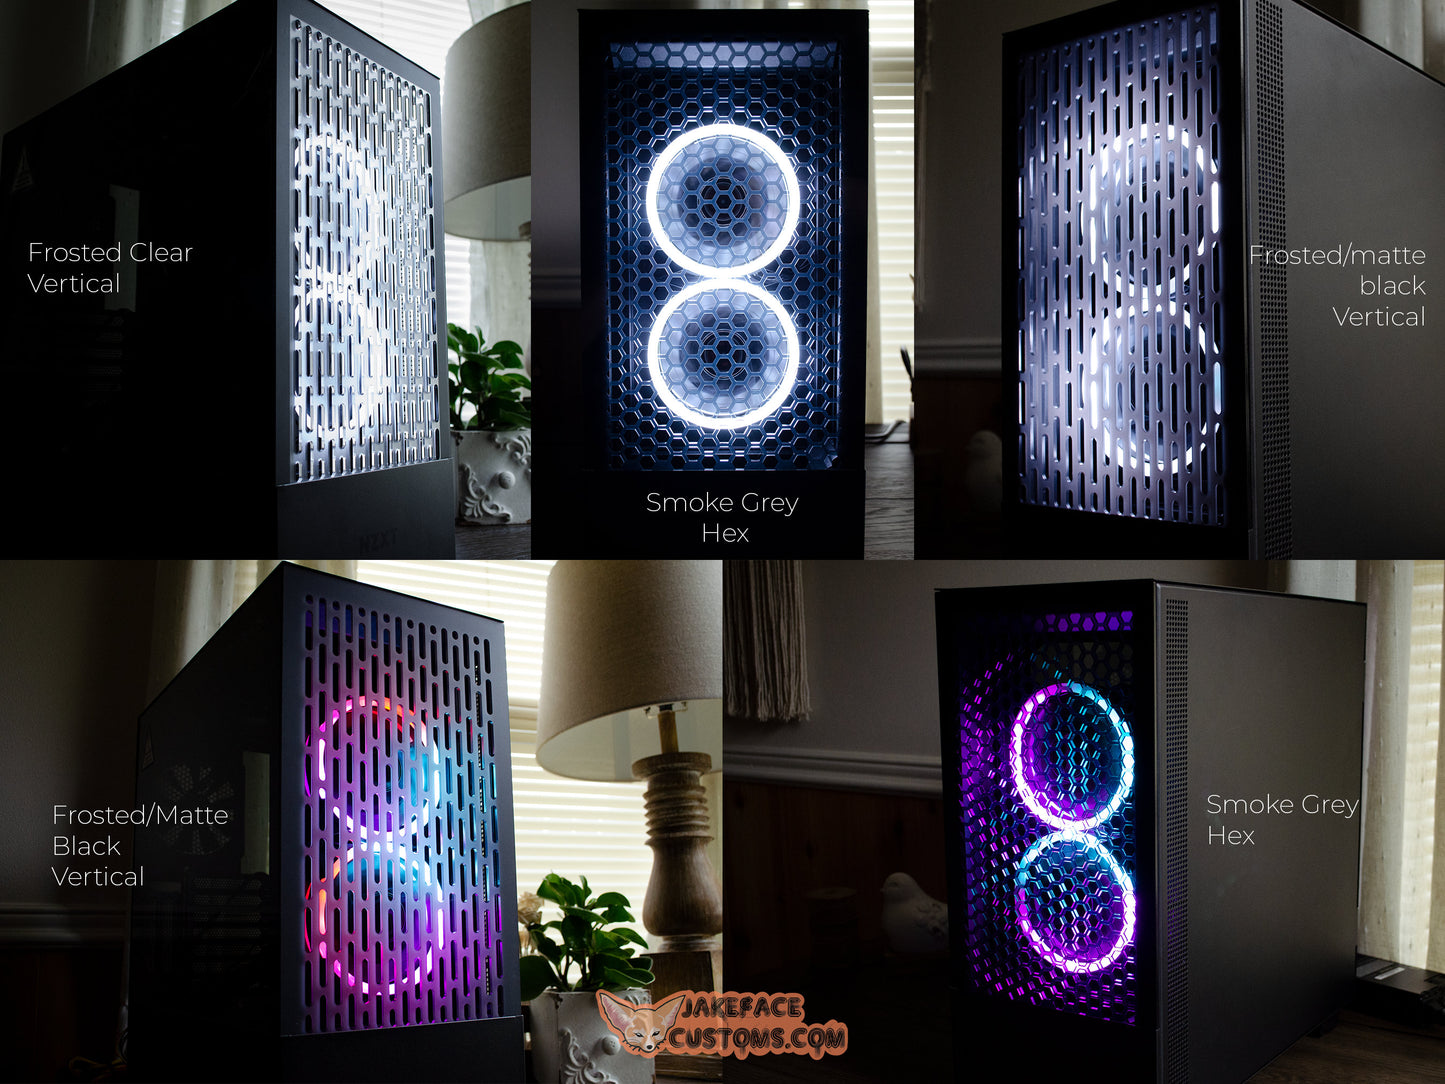
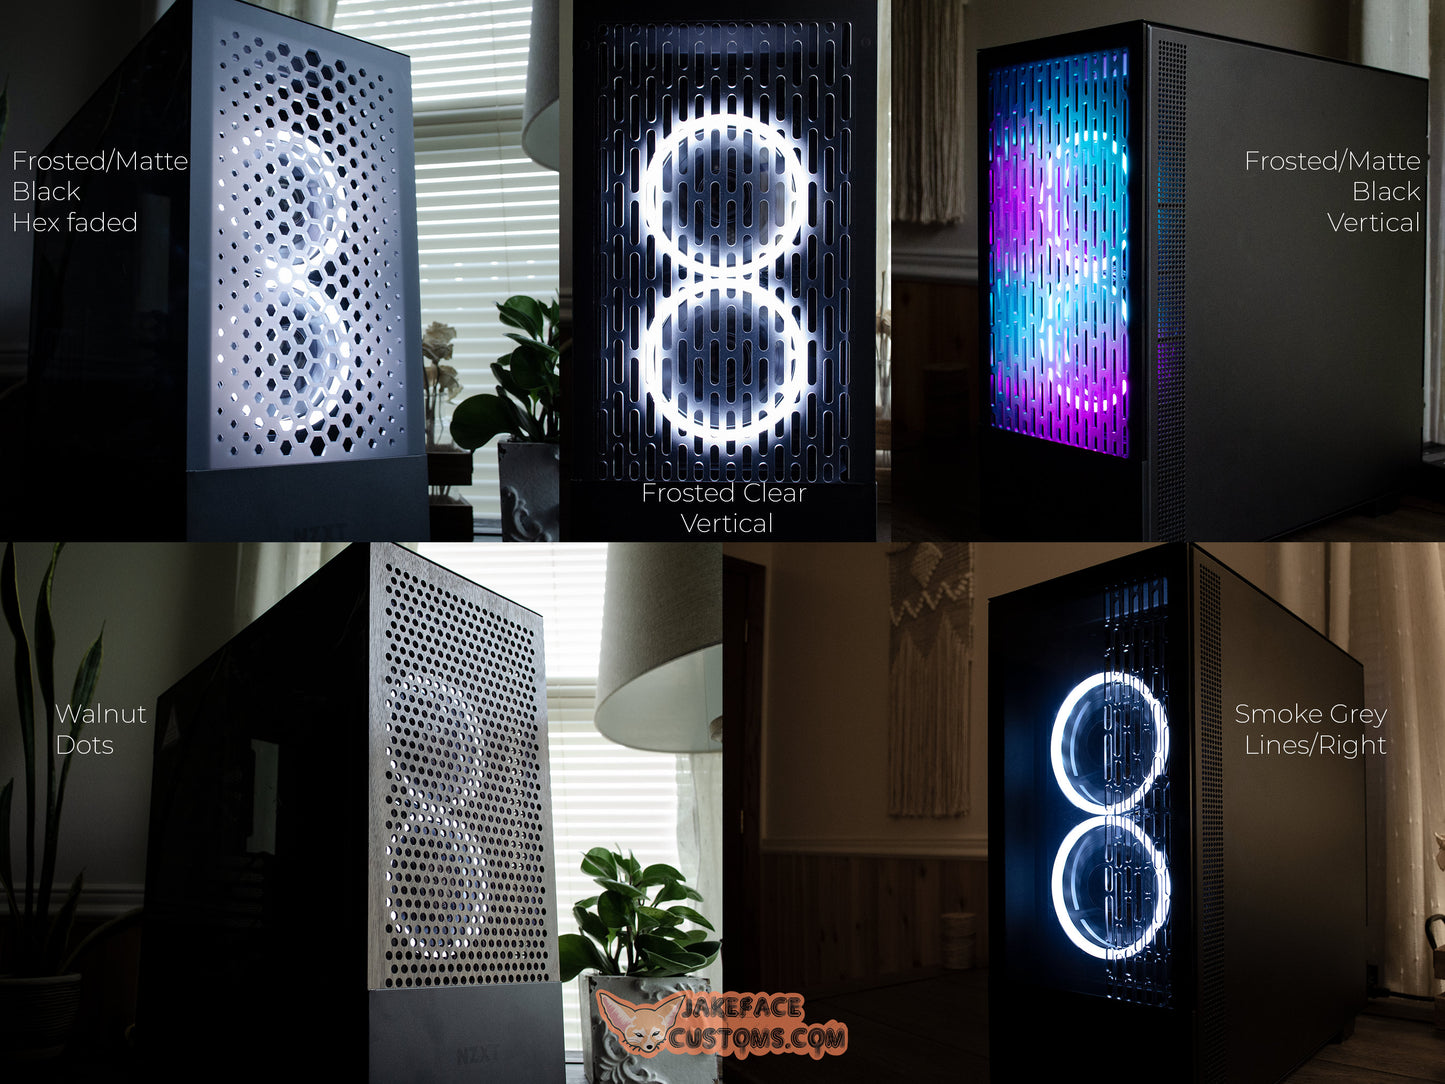
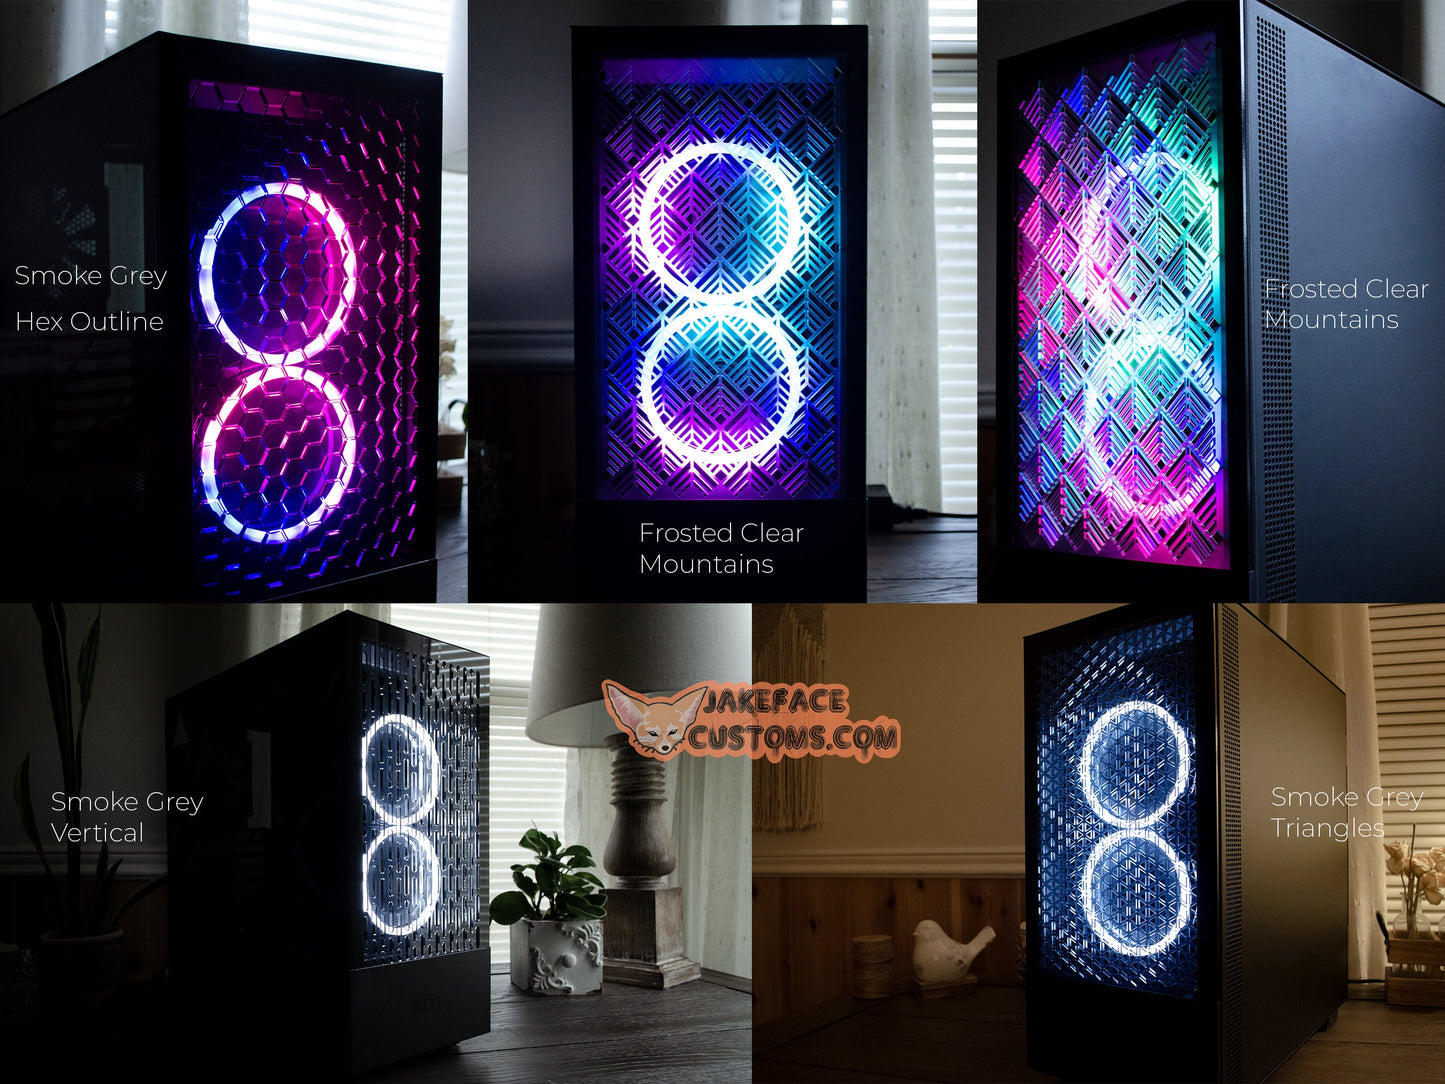
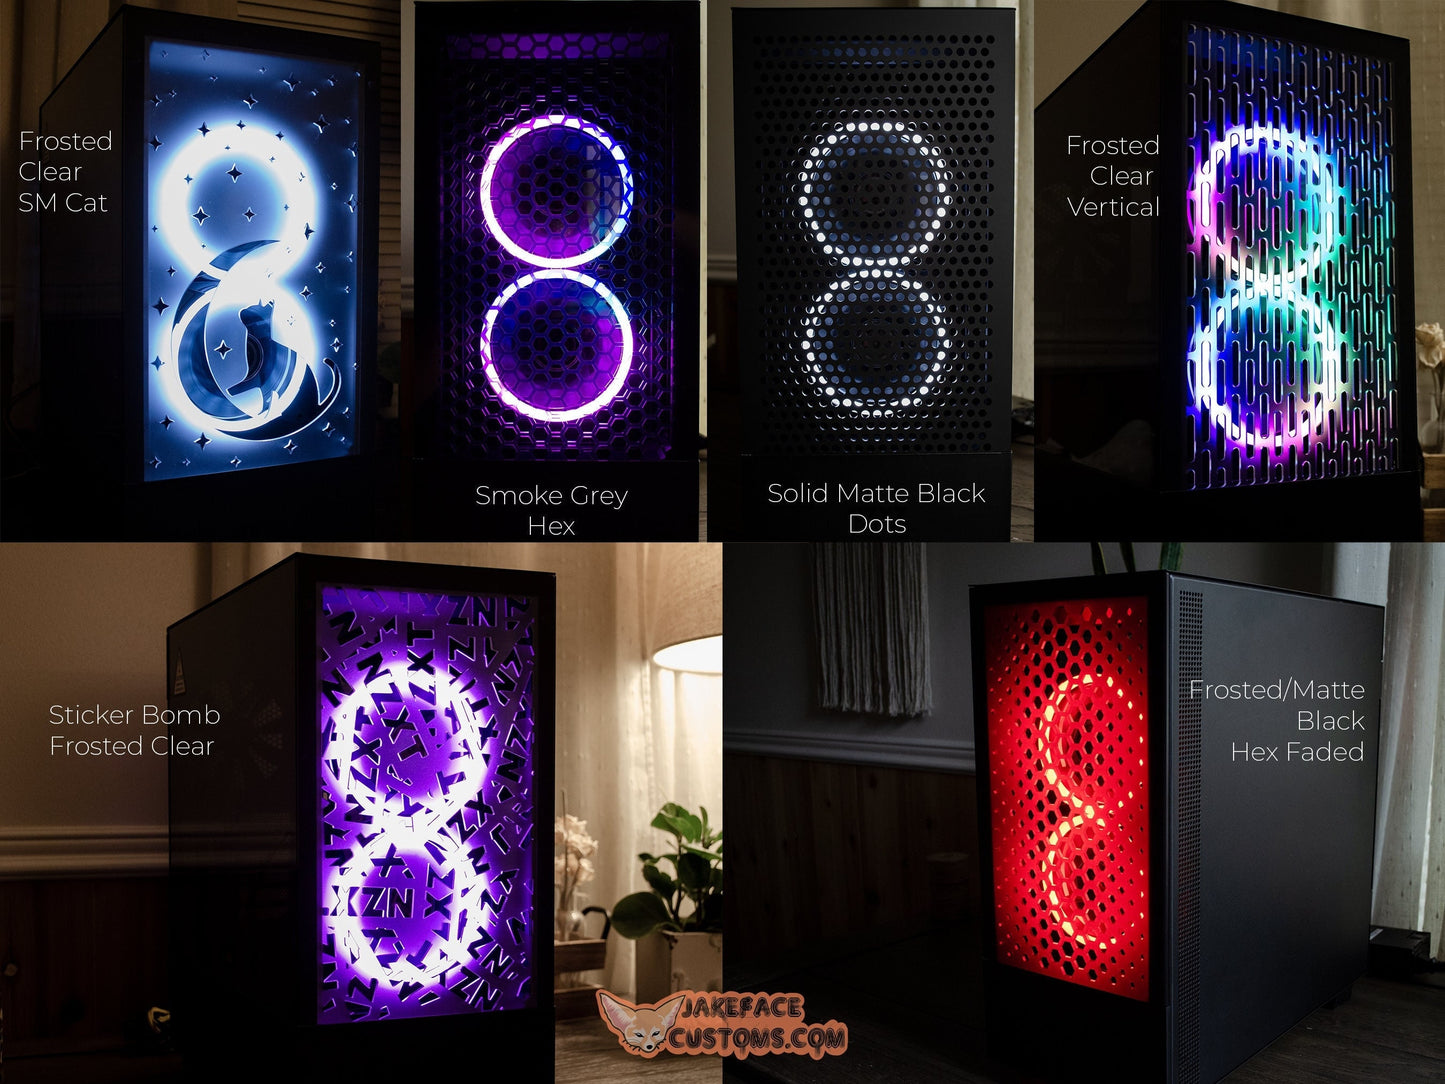
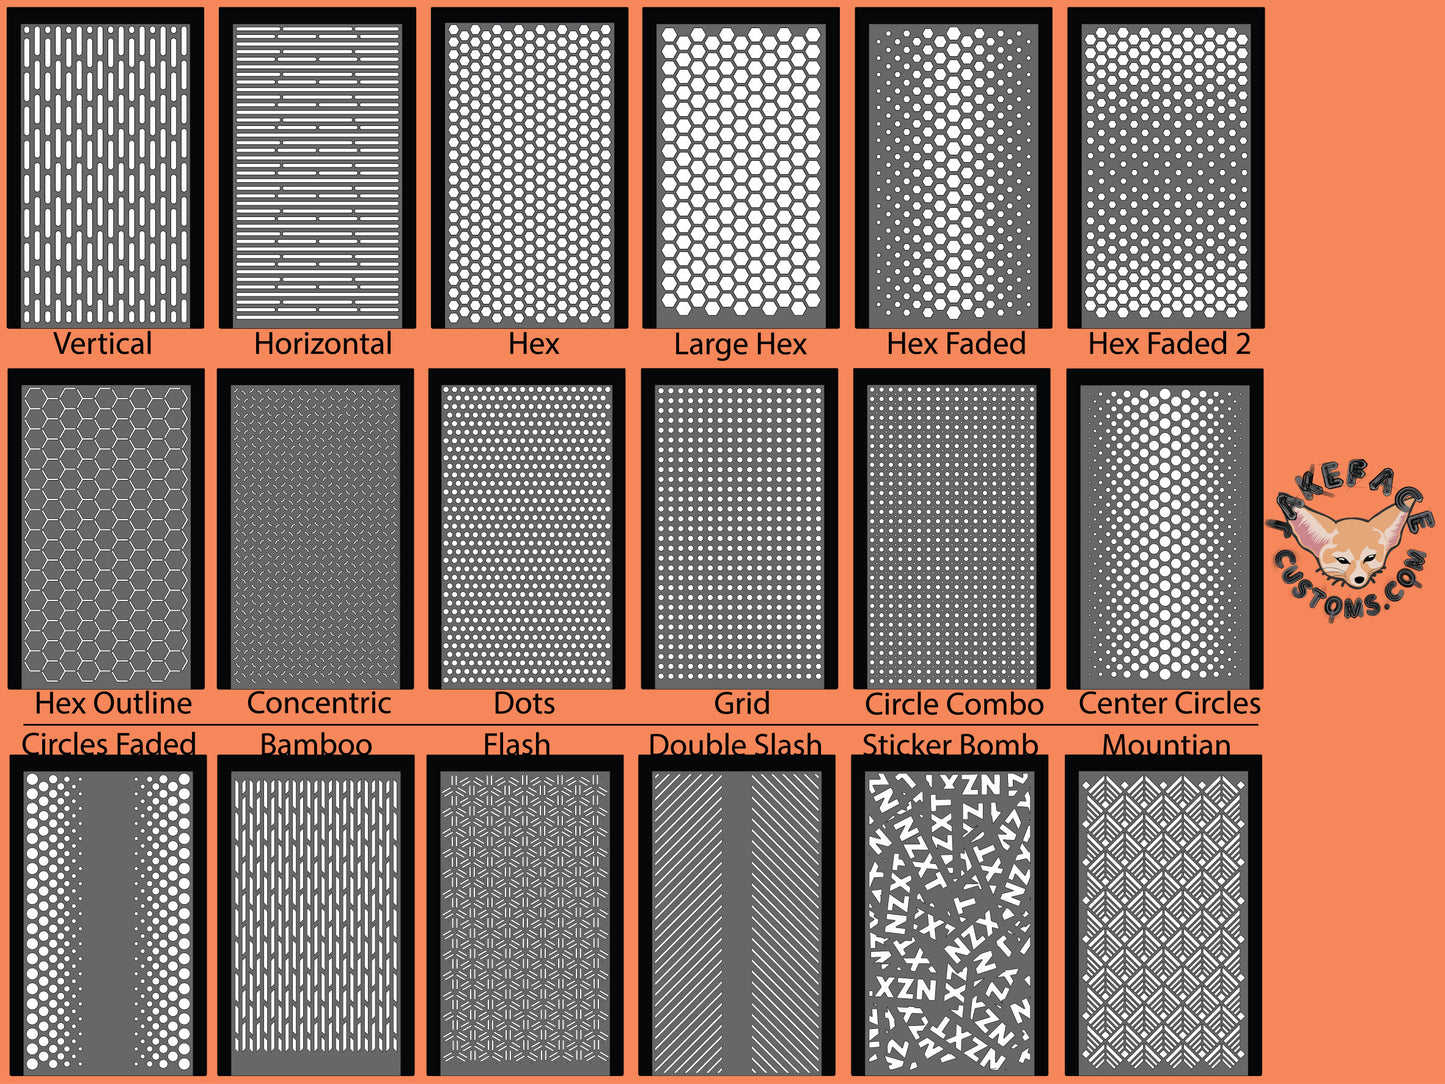
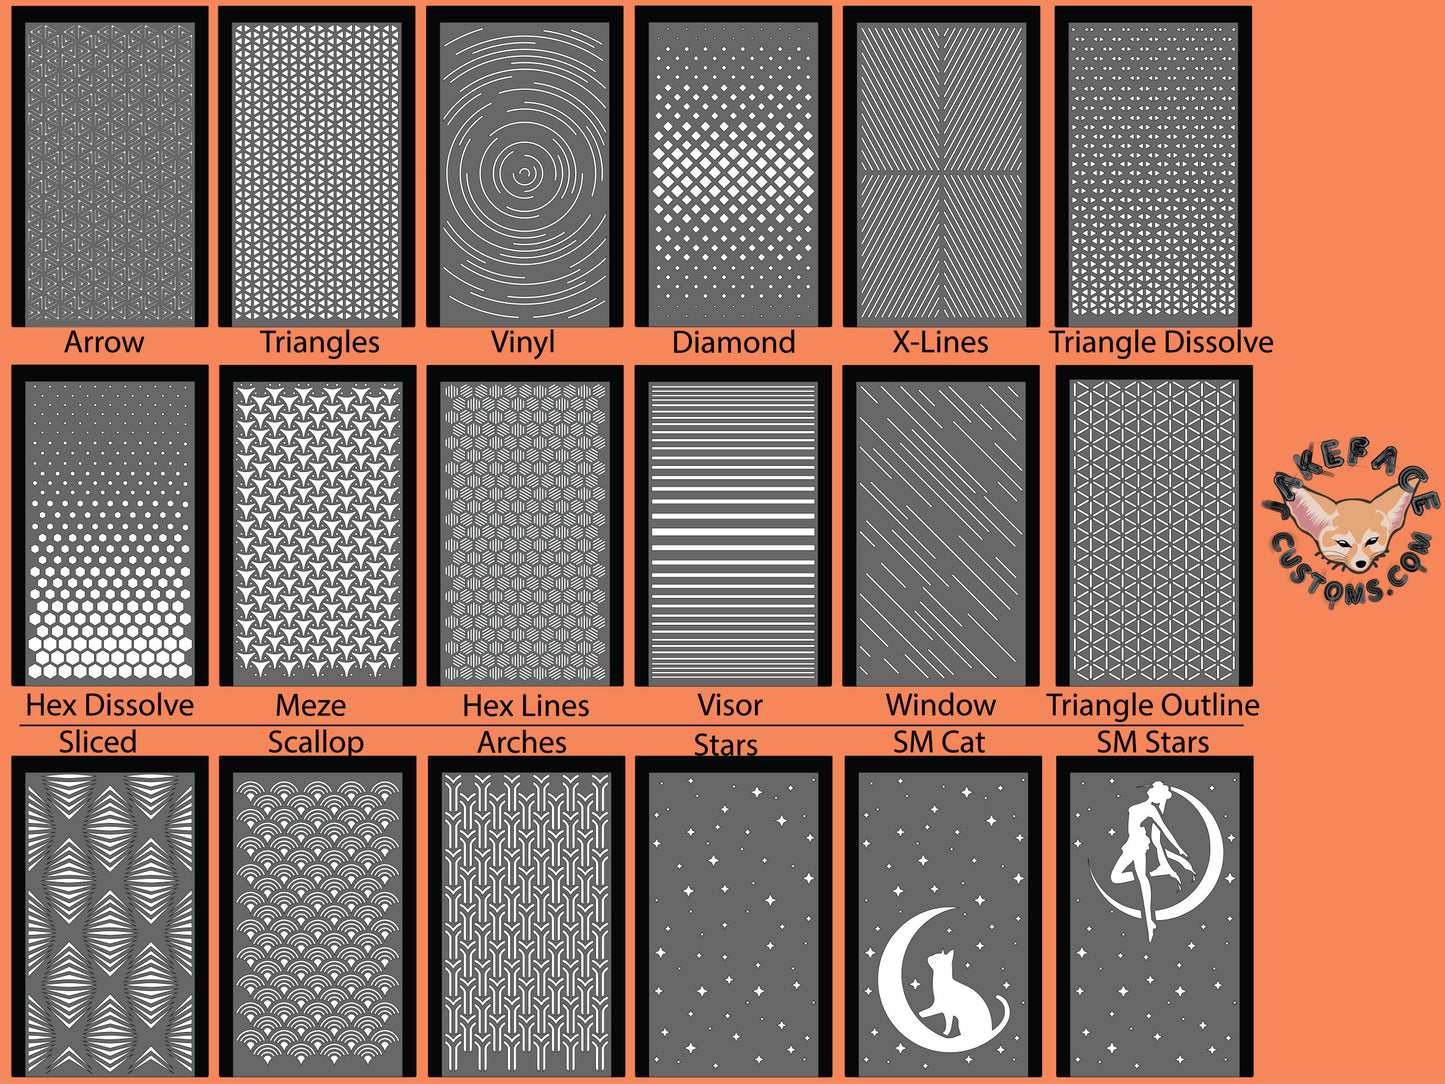
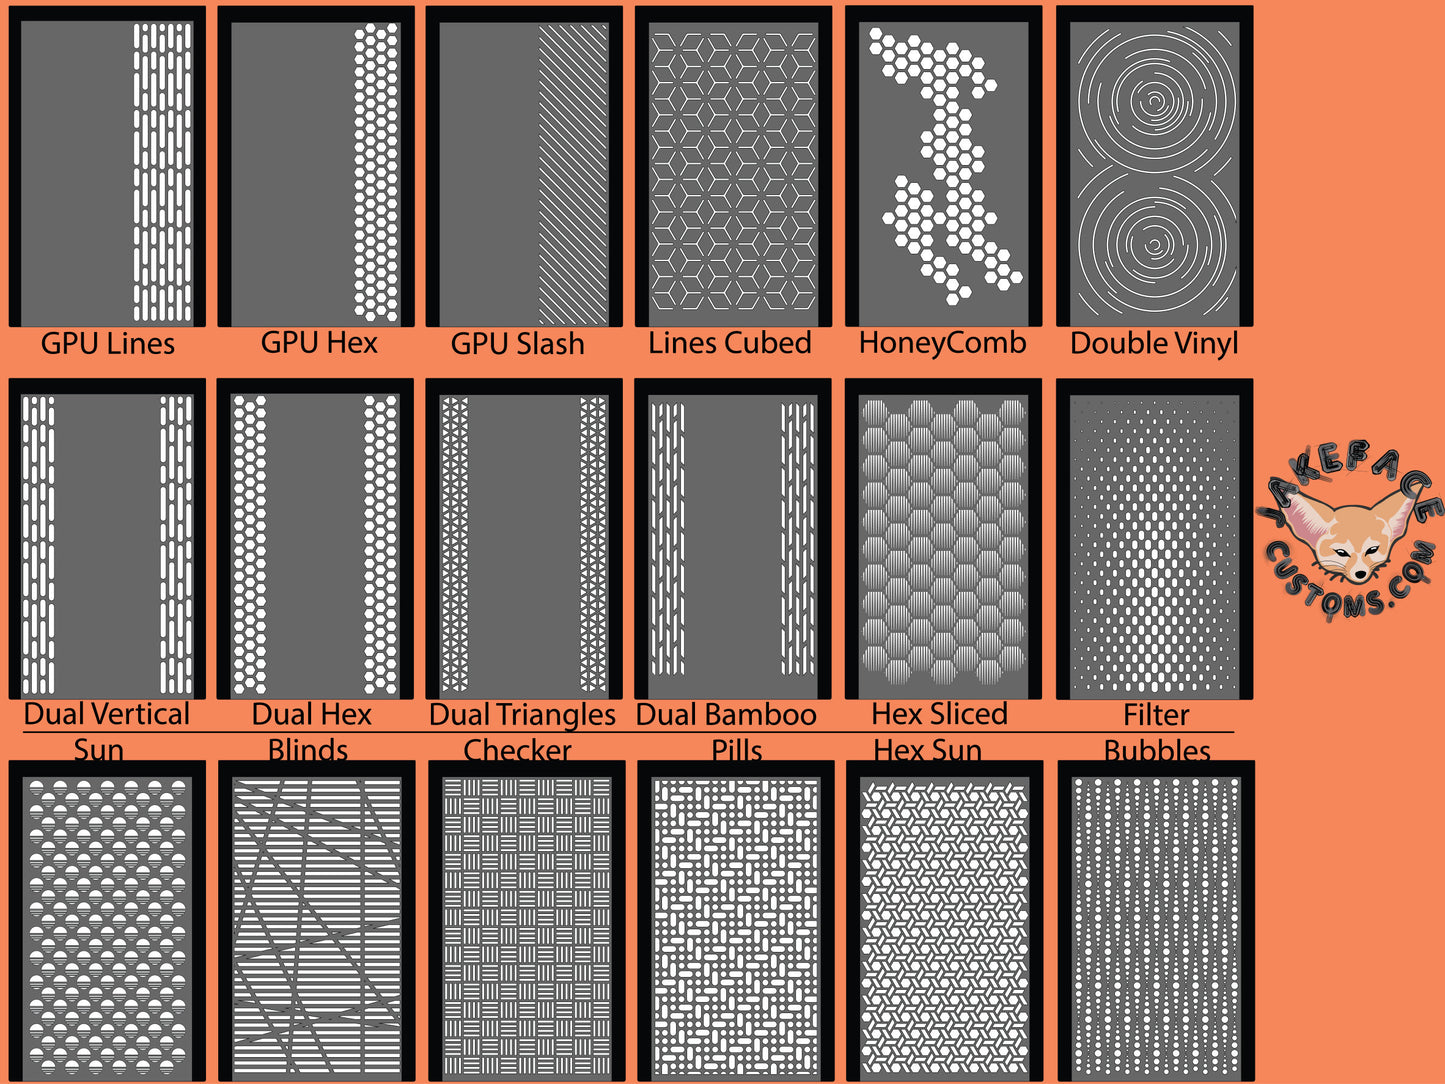
This is the ORIGINAL custom NZXT H510 Elite & Flow FRONT panel! I am the first creator of these vented acrylic panels, which feature opaque hand PAINTED BORDERS that hide the recessed strong magnets and the case frame for a sleek look and easy installation. The vents in my ORIGINAL designs improve airflow, lowering temperatures ~5-10 °C (varies by system). These are also designed to work with my custom H510 SIDE panels. The acrylic used is rigid, single-sourced, and comes protected with a paper-backing to ensure the best quality. All panels are made to order, by hand. Custom designs are available; please send me a message with your request!
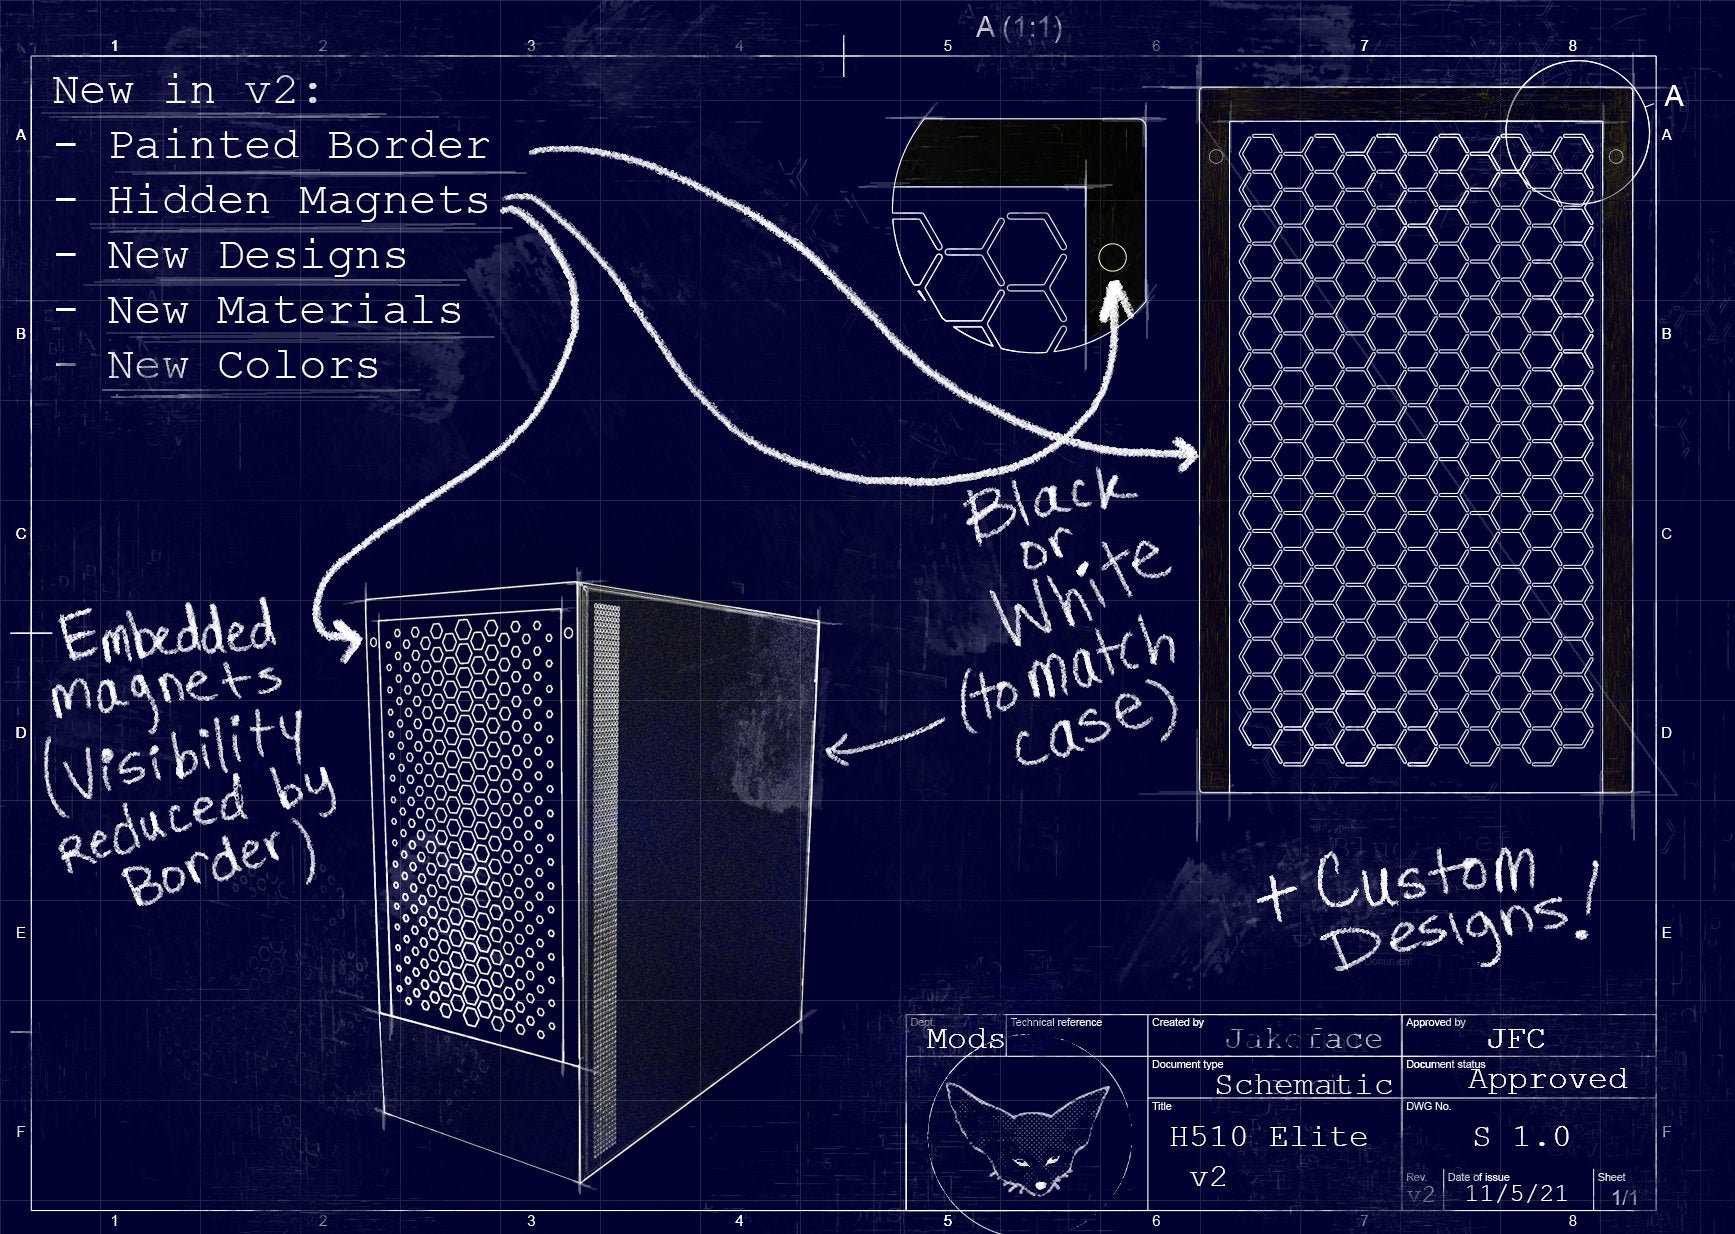
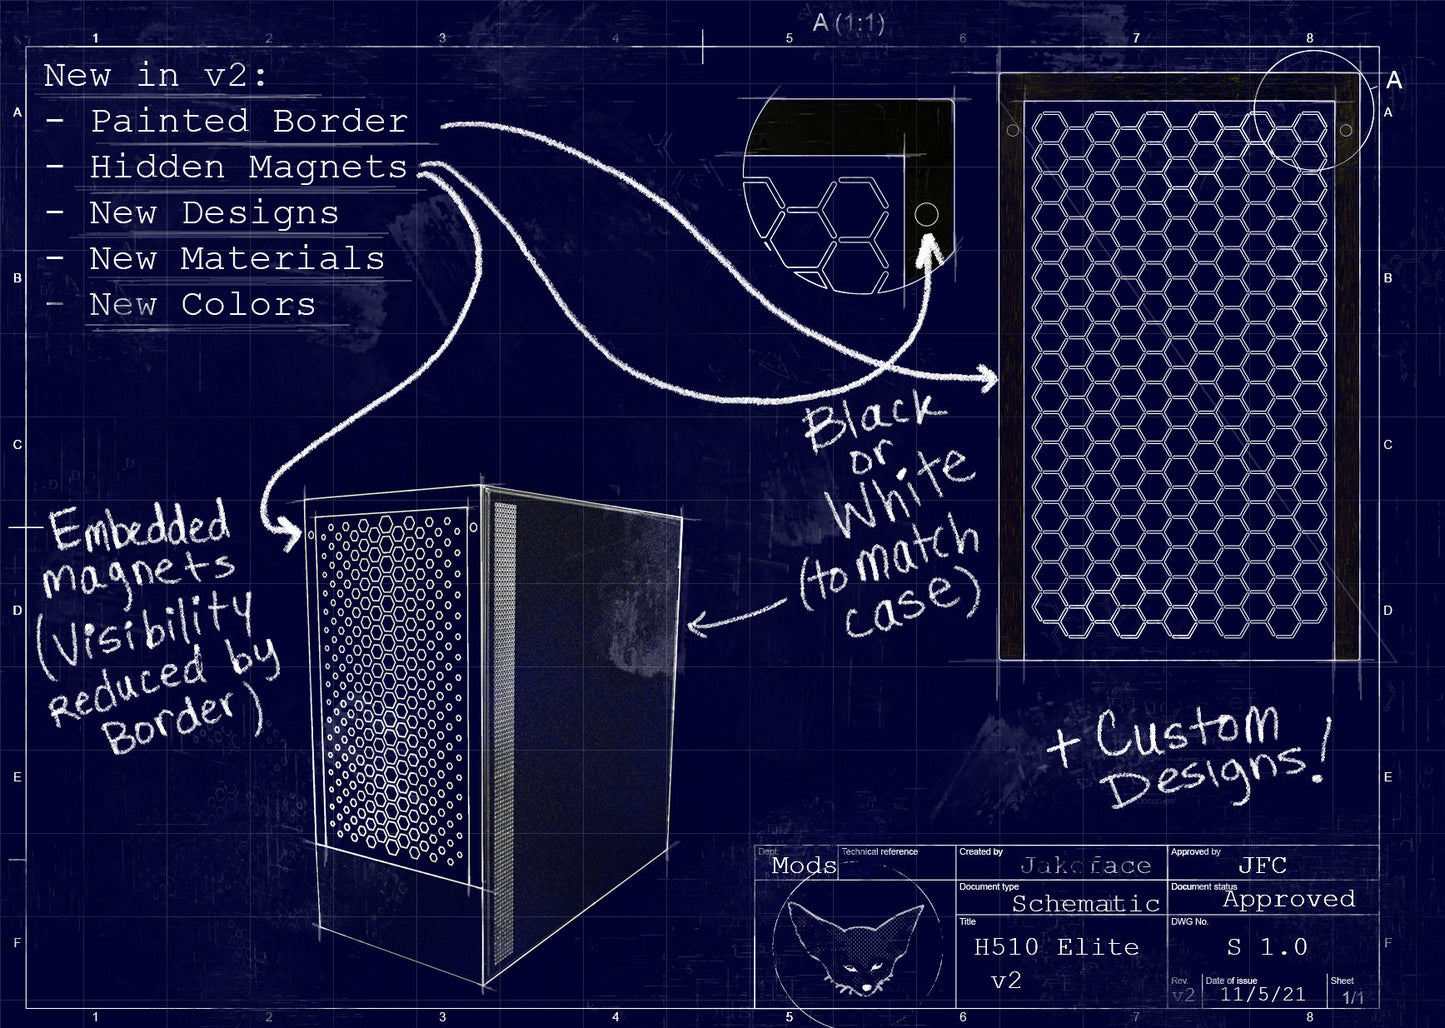
NEW IN VERSION 2!
PAINTED BORDER, hides the case frame and most of the magnets.
The default BORDER COLOR is BLACK! If you want a WHITE BORDER, leave a note or message me!
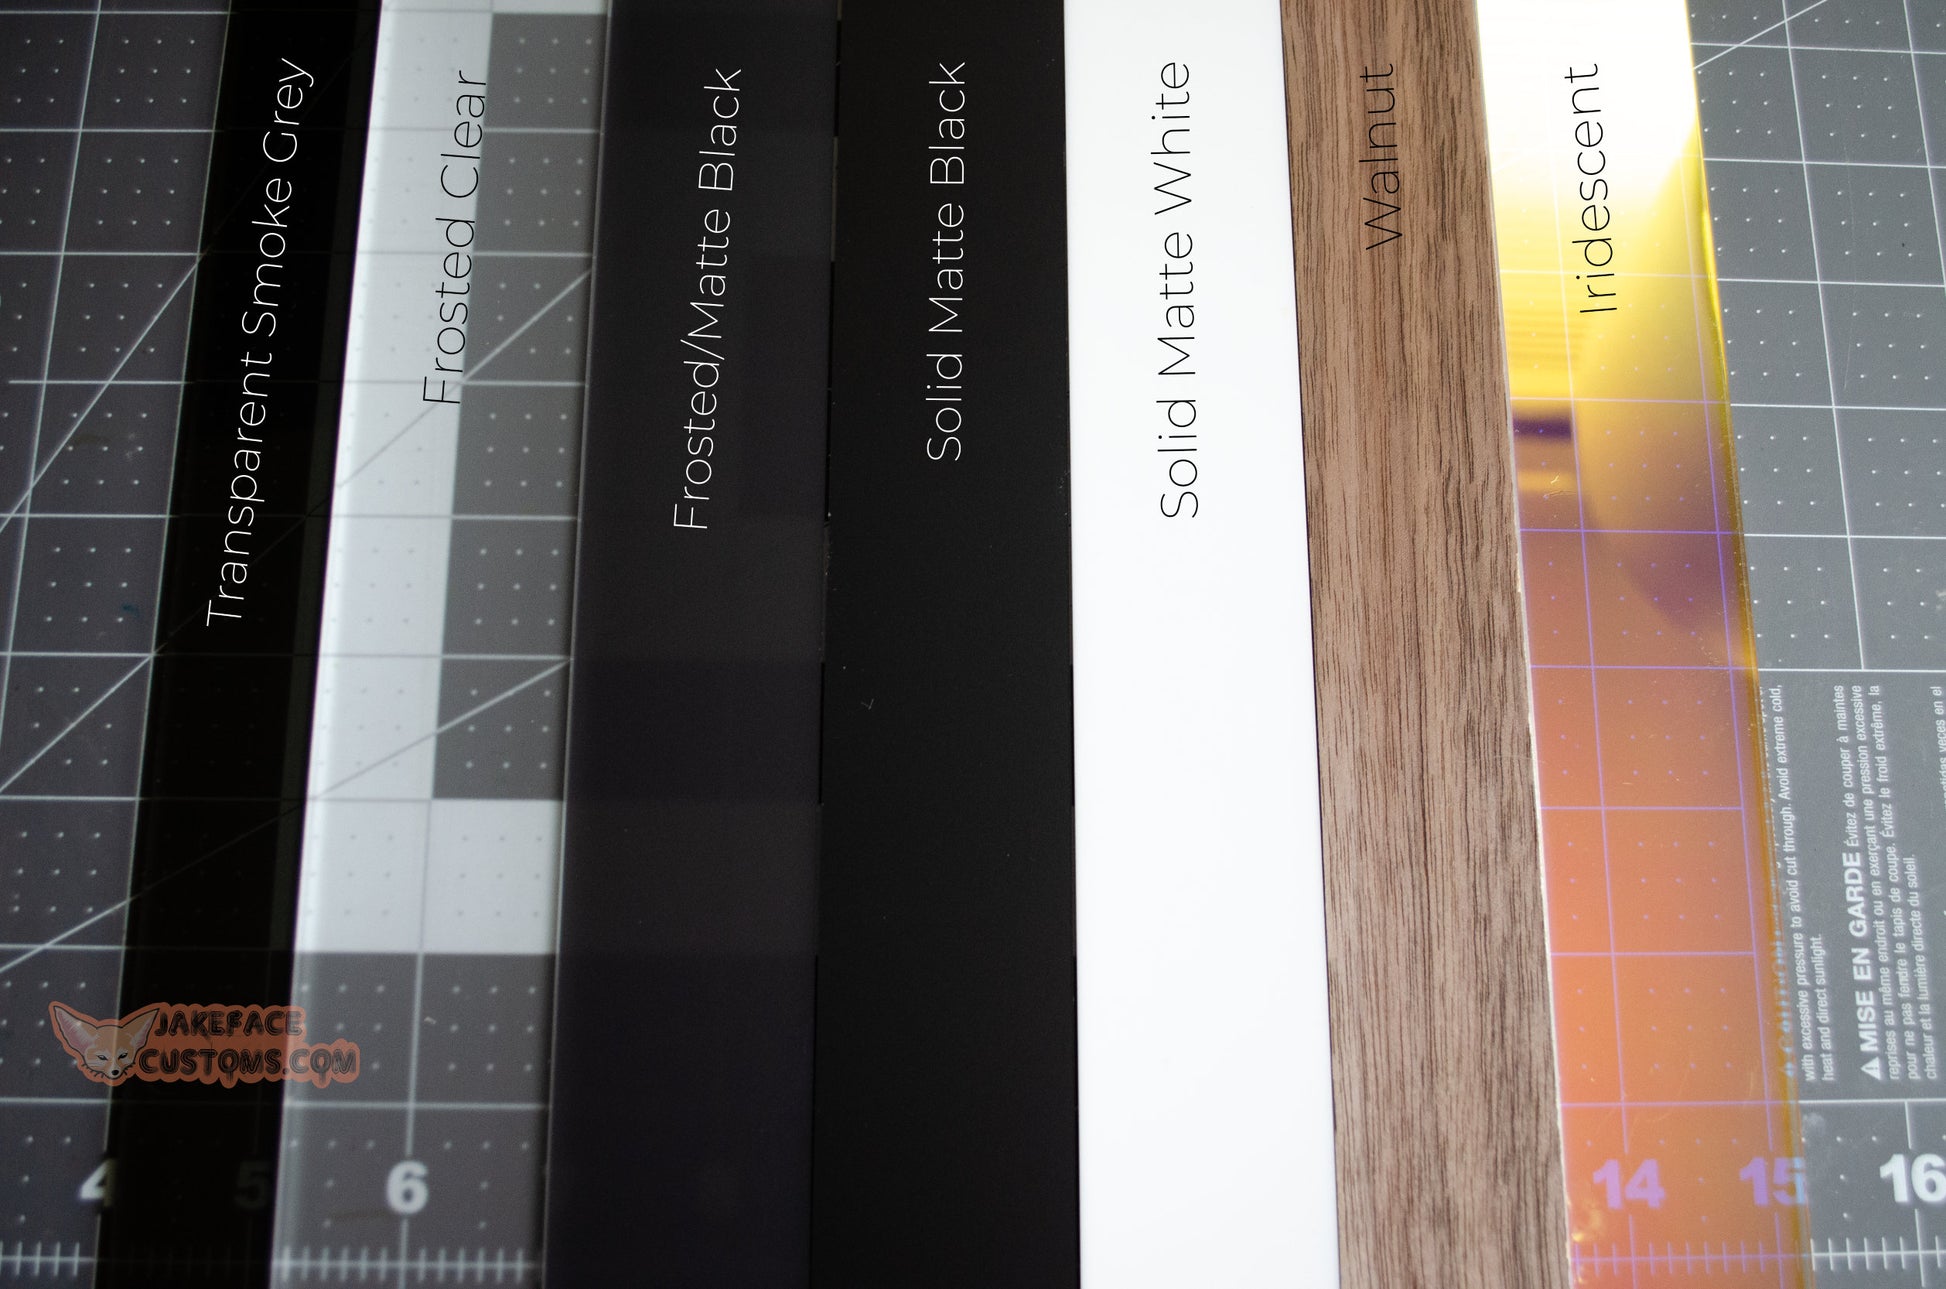
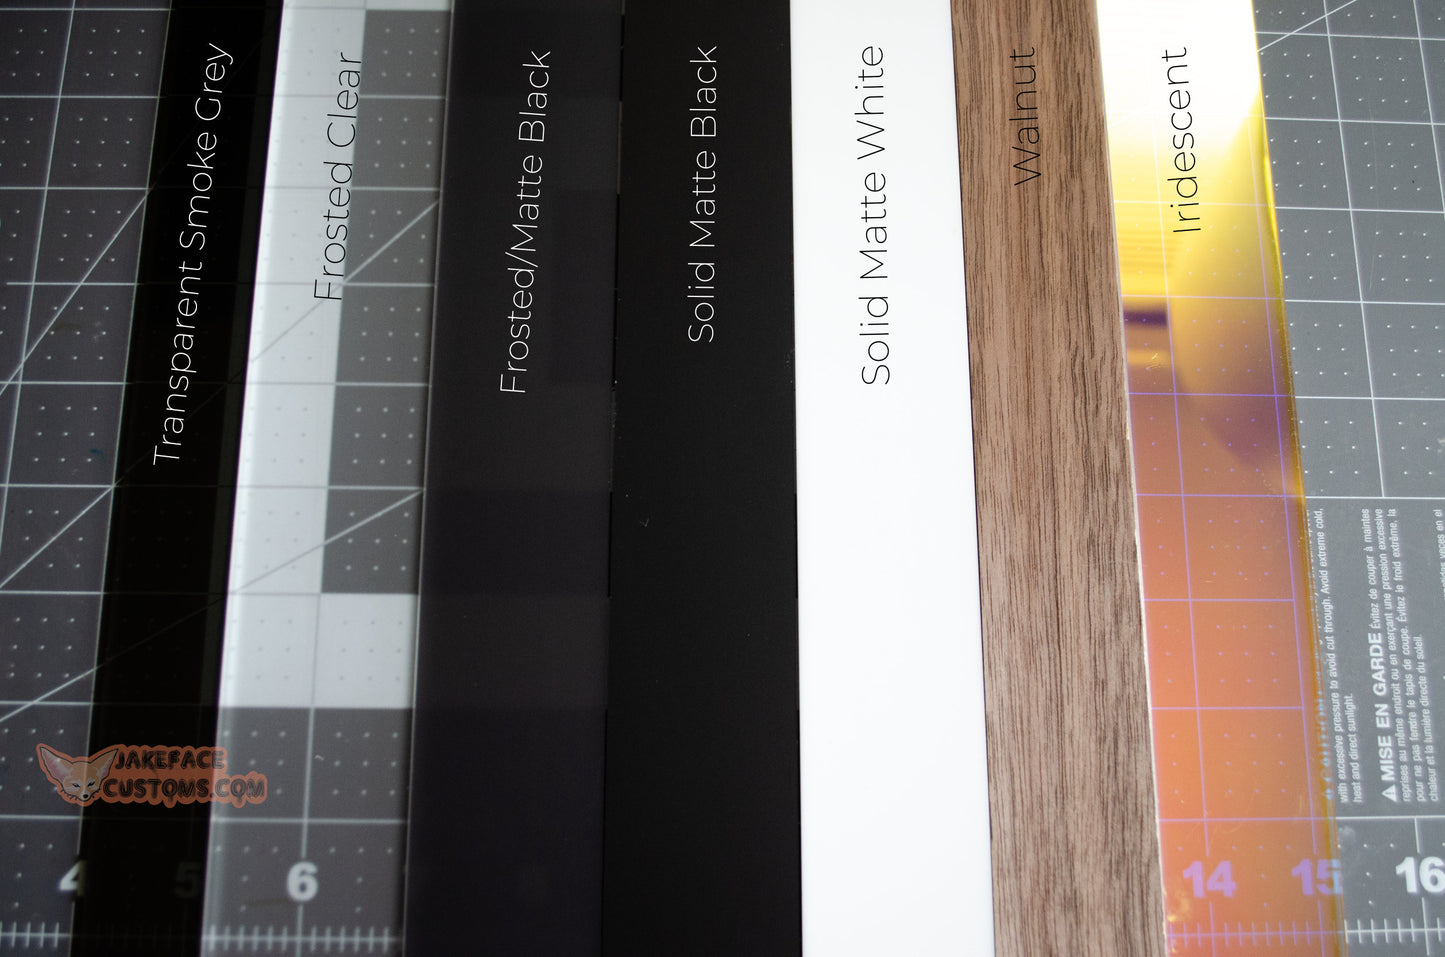
COLORS AVAILABLE ON THIS LISTING:
Clear - Standard Clear
Smoke Grey - Similar to the stock panels color
Frosted Clear - Clear with a diffused matte finish
Solid Matte Black
Solid Matte White
Walnut
*All panels are shipped with the paper still attached to prevent scratches during shipping.
*This listing is for a panel only, case is not included
Materials: Acrylic,magnets
Collapsible content
Installation
H510 Side Panel
If your new panel isn't fitting easily or you have a newer
model, check the front left corner of the case near the
bottom. There may be a metal tab blocking installation.
Simply bend down that tab in order to have an even fit.
H510 Front Panel
Remove both side panels. On the upper part of the case,
there is a little screw on either side that must be removed
for the original panel to pop off.
If the replacement panel is not fitting easily, especially if
you have a newer model: check the front of the case near
the left side for a small plastic wedge piece. This wedge
serves no purpose and must be removed for the front
panel to fit as intended.
H1 Front Panel
Before installation, remove the six rubber pads on the
front of the case (beneath the factory panel.)
Optional Fan Filters
If you purchased fan filters, these can be installed on the
front or back of your fans using the existing screws
already holding your fan in place.
A4H2O, Meshilicious, Q58, Ncase M1 and any other panel
with pins/pegs:
CAREFULLY and GENTLY install and remove!
Install: line up the pins and they should easily pop into
place (Don't smash!)
Remove: Remove carefully, one pin at a time while
keeping the panel close to the case. Do NOT yank or rip
the panel off from an angle or one side!
TIPS
- Installs like the stock panel!
- No modding required!
SHIPPING
- All international orders include Insurance
- International customers: Tax, duties/VAT may be collected at time of delivery.

